Building a Media Center with Raspberry Pi
Whether you have a smart TV or not, you can make a TV smarter by simply adding a computer. Going with OSMC on a Raspberry Pi is easy on your budget and it’s nice and small so you don’t have to clutter up your living room. I’m writing this as a “how I did it” tutorial, so if your situation is vastly different than mine, maybe this post won’t be of use to you. Anyway, let’s get started.
Things we’ll need
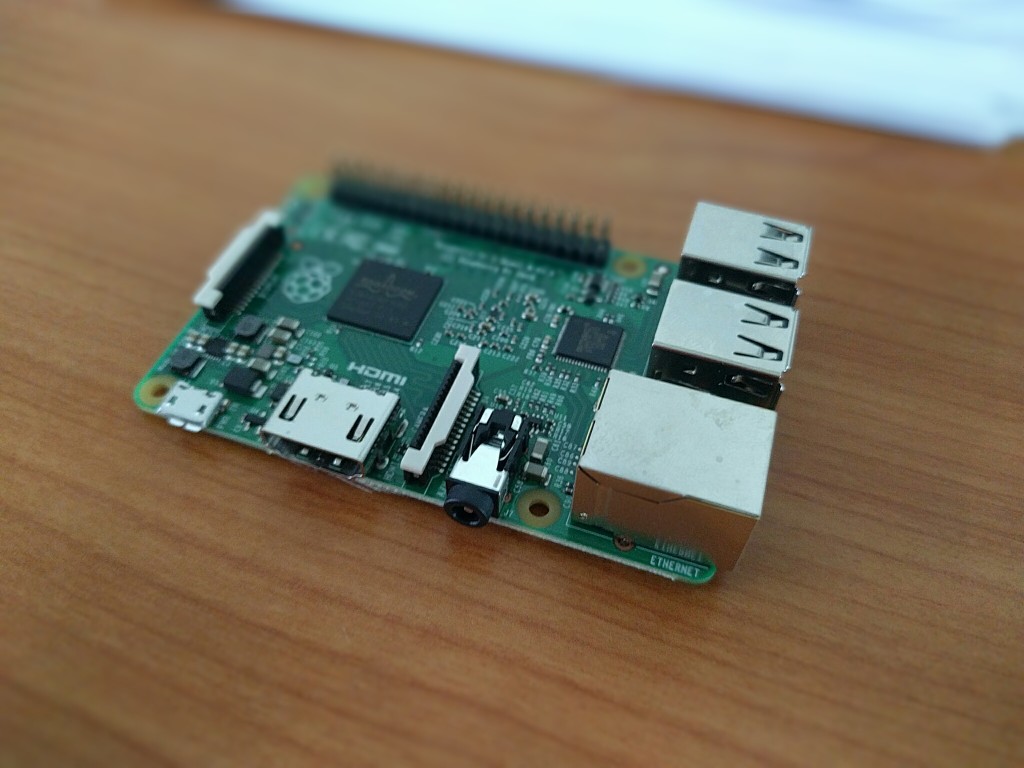
- Raspberry Pi 2 Model B
- USB WiFi adaptor
- Micro SD Card (16 GB Class 10 or better)
- Micro USB power supply (5V=1800mA or higher Amps)
- HDMI cable
- Case for the Raspberry Pi (Not required, but can be nice)
Some other things you’ll need but you probably already have is a TV that has an HDMI port and a PC for downloading and installing the operating system for the Raspberry Pi. Initially you’ll need a USB keyboard until you get the software ready for control via smartphone app. For that you’ll also need a smartphone and WiFi in your house. Once we have all the hardware ready we can start with the nitty gritty.
Download and Install OSMC
Plug your Micro SD card into your PC. Go to the OSMC website and download the installer. Run the installer, go through the steps in the wizard and OSMC will be downloaded and then installed to your Micro SD card.

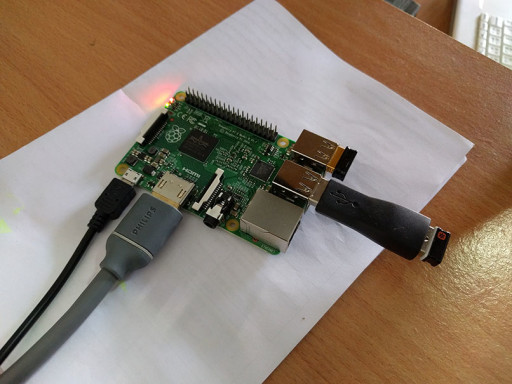
Plug in all the bits and bobs
Plug in the HDMI cable, Micro SD card, USB WiFi Adapter and your USB keyboard. Save the power supply for last, because plugging it in turns it on automatically.
Wait for a bit
The first time you turn it on, OSMC has to install itself to the Raspberry Pi. I know it feels like this should’ve been done already when you loaded OSMC onto the SD card but that’s not the case. It’ll take about 10 to 20 minutes.

Once it’s running, you’ll have to perform set up such as choosing language and region, logging into the WiFi (again?!) and possibly getting some updates. Your USB keyboard comes in super handy right here. Once everything is set up do a reboot to make sure all the settings are fixed in place.
Get the app on your phone
There are several apps available, but I went with Yatse. Do a search for OSMC on the app store of your choice and pick what you like. When the app is connected and works, you can unplug your USB keyboard. You won’t need it anymore. From this point on you can use the app to control OSMC.

Have fun!
Now you can start adding addons for OSMC, such as the YouTube addon which allows you to watch… YouTube clips… You can also connect network storage or you can plug in a USB flash drive (formatted to FAT) and play media off of there. If you went with a big enough Micro SD card you can save a bunch of media on there too! It’s up to you now!
Update (6 April 2016)
New article going into a bit more detail on how to best enjoy YouTube on your OSMC Raspberry Pi.
17 Jul, 2026
16 Jul, 2026
16 Jul, 2026
16 Jul, 2026
16 Jul, 2026
16 Jul, 2026
16 Jul, 2026
16 Jul, 2026
16 Jul, 2026
16 Jul, 2026
15 Jul, 2026
15 Jul, 2026
15 Jul, 2026
15 Jul, 2026
15 Jul, 2026
15 Jul, 2026
15 Jul, 2026
15 Jul, 2026
15 Jul, 2026
15 Jul, 2026
15 Jul, 2026
14 Jul, 2026
14 Jul, 2026
14 Jul, 2026
14 Jul, 2026
14 Jul, 2026
13 Jul, 2026
13 Jul, 2026
13 Jul, 2026
13 Jul, 2026
13 Jul, 2026
13 Jul, 2026
13 Jul, 2026
12 Jul, 2026
12 Jul, 2026
12 Jul, 2026
12 Jul, 2026
12 Jul, 2026
12 Jul, 2026
12 Jul, 2026
11 Jul, 2026
11 Jul, 2026
11 Jul, 2026
11 Jul, 2026
11 Jul, 2026
11 Jul, 2026
11 Jul, 2026
11 Jul, 2026
10 Jul, 2026
10 Jul, 2026
10 Jul, 2026
10 Jul, 2026
10 Jul, 2026
10 Jul, 2026
9 Jul, 2026
9 Jul, 2026
9 Jul, 2026
9 Jul, 2026
9 Jul, 2026
9 Jul, 2026
9 Jul, 2026
9 Jul, 2026
9 Jul, 2026
8 Jul, 2026
8 Jul, 2026
8 Jul, 2026
8 Jul, 2026
8 Jul, 2026
7 Jul, 2026
7 Jul, 2026
7 Jul, 2026
6 Jul, 2026
6 Jul, 2026
6 Jul, 2026
6 Jul, 2026
6 Jul, 2026
5 Jul, 2026
5 Jul, 2026
5 Jul, 2026
5 Jul, 2026
4 Jul, 2026
4 Jul, 2026
3 Jul, 2026
3 Jul, 2026
2 Jul, 2026
2 Jul, 2026
2 Jul, 2026
30 Jun, 2026
29 Jun, 2026
26 Jun, 2026
26 Jun, 2026
25 Jun, 2026
25 Jun, 2026
24 Jun, 2026
22 Jun, 2026
21 Jun, 2026
21 Jun, 2026
21 Jun, 2026
20 Jun, 2026
18 Jun, 2026
18 Jun, 2026
18 Jun, 2026
18 Jun, 2026
18 Jun, 2026
18 Jun, 2026
17 Jun, 2026
17 Jun, 2026
17 Jun, 2026
16 Jun, 2026
16 Jun, 2026
16 Jun, 2026
16 Jun, 2026
16 Jun, 2026
16 Jun, 2026
16 Jun, 2026
14 Jun, 2026
14 Jun, 2026
14 Jun, 2026
14 Jun, 2026
14 Jun, 2026
14 Jun, 2026
14 Jun, 2026
13 Jun, 2026
13 Jun, 2026
12 Jun, 2026
11 Jun, 2026
10 Jun, 2026
10 Jun, 2026
9 Jun, 2026
9 Jun, 2026
8 Jun, 2026
8 Jun, 2026
8 Jun, 2026
8 Jun, 2026
7 Jun, 2026
7 Jun, 2026
7 Jun, 2026
7 Jun, 2026
7 Jun, 2026
7 Jun, 2026
7 Jun, 2026
7 Jun, 2026
6 Jun, 2026
6 Jun, 2026
6 Jun, 2026
6 Jun, 2026
6 Jun, 2026
6 Jun, 2026
6 Jun, 2026
6 Jun, 2026
6 Jun, 2026
6 Jun, 2026
6 Jun, 2026
6 Jun, 2026
6 Jun, 2026
5 Jun, 2026
5 Jun, 2026
5 Jun, 2026
5 Jun, 2026
5 Jun, 2026
5 Jun, 2026
5 Jun, 2026
5 Jun, 2026
5 Jun, 2026
5 Jun, 2026
5 Jun, 2026
4 Jun, 2026
4 Jun, 2026
3 Jun, 2026
3 Jun, 2026
3 Jun, 2026
3 Jun, 2026
3 Jun, 2026
3 Jun, 2026
3 Jun, 2026
3 Jun, 2026
3 Jun, 2026
26 May, 2026
20 May, 2026
18 May, 2026
6 May, 2026
5 May, 2026
4 May, 2026
1 May, 2026
30 Apr, 2026
30 Apr, 2026
30 Apr, 2026
30 Apr, 2026
30 Apr, 2026
30 Apr, 2026
30 Apr, 2026
30 Apr, 2026
30 Apr, 2026
30 Apr, 2026
30 Apr, 2026
30 Apr, 2026
30 Apr, 2026
30 Apr, 2026
30 Apr, 2026
30 Apr, 2026
29 Apr, 2026
29 Apr, 2026
29 Apr, 2026
29 Apr, 2026
29 Apr, 2026
29 Apr, 2026
29 Apr, 2026
29 Apr, 2026
29 Apr, 2026
29 Apr, 2026
29 Apr, 2026
28 Apr, 2026
27 Apr, 2026
27 Apr, 2026
27 Apr, 2026
25 Apr, 2026
25 Apr, 2026
25 Apr, 2026
25 Apr, 2026
25 Apr, 2026
25 Apr, 2026
25 Apr, 2026
25 Apr, 2026
25 Apr, 2026
25 Apr, 2026
25 Apr, 2026
25 Apr, 2026
25 Apr, 2026
25 Apr, 2026
25 Apr, 2026
25 Apr, 2026
25 Apr, 2026
25 Apr, 2026
25 Apr, 2026
25 Apr, 2026
25 Apr, 2026
25 Apr, 2026
25 Apr, 2026
25 Apr, 2026
25 Apr, 2026
24 Apr, 2026
24 Apr, 2026
24 Apr, 2026
24 Apr, 2026
24 Apr, 2026
24 Apr, 2026
24 Apr, 2026
24 Apr, 2026
24 Apr, 2026
24 Apr, 2026
24 Apr, 2026
24 Apr, 2026
24 Apr, 2026
24 Apr, 2026
24 Apr, 2026
24 Apr, 2026
20 Apr, 2026
20 Apr, 2026
26 Mar, 2026
24 Mar, 2026
24 Mar, 2026
24 Mar, 2026
24 Mar, 2026
24 Mar, 2026
23 Mar, 2026
23 Mar, 2026
22 Mar, 2026
22 Mar, 2026
22 Mar, 2026
22 Mar, 2026
18 Mar, 2026
18 Mar, 2026
18 Mar, 2026
17 Mar, 2026
17 Mar, 2026
17 Mar, 2026
17 Mar, 2026
17 Mar, 2026
15 Mar, 2026
15 Mar, 2026
15 Mar, 2026
15 Mar, 2026
15 Mar, 2026
15 Mar, 2026
14 Mar, 2026
14 Mar, 2026
14 Mar, 2026
14 Mar, 2026
14 Mar, 2026
14 Mar, 2026
14 Mar, 2026
14 Mar, 2026
14 Mar, 2026
8 Mar, 2026
8 Mar, 2026
7 Mar, 2026
6 Mar, 2026
6 Mar, 2026
6 Mar, 2026
5 Mar, 2026
5 Mar, 2026
5 Mar, 2026
5 Mar, 2026
5 Mar, 2026
5 Mar, 2026
5 Mar, 2026
4 Mar, 2026
4 Mar, 2026
4 Mar, 2026
4 Mar, 2026
4 Mar, 2026
4 Mar, 2026
4 Mar, 2026
4 Mar, 2026
3 Mar, 2026
3 Mar, 2026
2 Mar, 2026
2 Mar, 2026
2 Mar, 2026
2 Mar, 2026
2 Mar, 2026
2 Mar, 2026
1 Mar, 2026
1 Mar, 2026
1 Mar, 2026
1 Mar, 2026
1 Mar, 2026
1 Mar, 2026
1 Mar, 2026
1 Mar, 2026
1 Mar, 2026
1 Mar, 2026
1 Mar, 2026
1 Mar, 2026
1 Mar, 2026
1 Mar, 2026
1 Mar, 2026
1 Mar, 2026
28 Feb, 2026
28 Feb, 2026
28 Feb, 2026
28 Feb, 2026
28 Feb, 2026
28 Feb, 2026
28 Feb, 2026
27 Feb, 2026
27 Feb, 2026
27 Feb, 2026
27 Feb, 2026
27 Feb, 2026
27 Feb, 2026
27 Feb, 2026
27 Feb, 2026
27 Feb, 2026
26 Feb, 2026
26 Feb, 2026
26 Feb, 2026
26 Feb, 2026
26 Feb, 2026
26 Feb, 2026
26 Feb, 2026
26 Feb, 2026
26 Feb, 2026
25 Feb, 2026
25 Feb, 2026
25 Feb, 2026
24 Feb, 2026
24 Feb, 2026
24 Feb, 2026
24 Feb, 2026
24 Feb, 2026
24 Feb, 2026
24 Feb, 2026
24 Feb, 2026
24 Feb, 2026
24 Feb, 2026
24 Feb, 2026
23 Feb, 2026
23 Feb, 2026
23 Feb, 2026
23 Feb, 2026
23 Feb, 2026
23 Feb, 2026
22 Feb, 2026
22 Feb, 2026
22 Feb, 2026
22 Feb, 2026
22 Feb, 2026
22 Feb, 2026
21 Feb, 2026
21 Feb, 2026
21 Feb, 2026
21 Feb, 2026
21 Feb, 2026
21 Feb, 2026
20 Feb, 2026
20 Feb, 2026
20 Feb, 2026
20 Feb, 2026
20 Feb, 2026
20 Feb, 2026
20 Feb, 2026
20 Feb, 2026
20 Feb, 2026
20 Feb, 2026
20 Feb, 2026
20 Feb, 2026
20 Feb, 2026
19 Feb, 2026
19 Feb, 2026
19 Feb, 2026
18 Feb, 2026
18 Feb, 2026
18 Feb, 2026
18 Feb, 2026
18 Feb, 2026
18 Feb, 2026
18 Feb, 2026
18 Feb, 2026
18 Feb, 2026
18 Feb, 2026
17 Feb, 2026
17 Feb, 2026
17 Feb, 2026
17 Feb, 2026
17 Feb, 2026
17 Feb, 2026
17 Feb, 2026
17 Feb, 2026
17 Feb, 2026
17 Feb, 2026
17 Feb, 2026
17 Feb, 2026
17 Feb, 2026
17 Feb, 2026
17 Feb, 2026
17 Feb, 2026
16 Feb, 2026
16 Feb, 2026
16 Feb, 2026
16 Feb, 2026
16 Feb, 2026
16 Feb, 2026
16 Feb, 2026
16 Feb, 2026
16 Feb, 2026
16 Feb, 2026
16 Feb, 2026
16 Feb, 2026
15 Feb, 2026
15 Feb, 2026
15 Feb, 2026
15 Feb, 2026
15 Feb, 2026
15 Feb, 2026
15 Feb, 2026
14 Feb, 2026
14 Feb, 2026
14 Feb, 2026
14 Feb, 2026
14 Feb, 2026
14 Feb, 2026
14 Feb, 2026
14 Feb, 2026
14 Feb, 2026
14 Feb, 2026
13 Feb, 2026
13 Feb, 2026
13 Feb, 2026
13 Feb, 2026
13 Feb, 2026
13 Feb, 2026
12 Feb, 2026
12 Feb, 2026
12 Feb, 2026
12 Feb, 2026
12 Feb, 2026
12 Feb, 2026
12 Feb, 2026
11 Feb, 2026
11 Feb, 2026
11 Feb, 2026
11 Feb, 2026
11 Feb, 2026
9 Feb, 2026
9 Feb, 2026
9 Feb, 2026
9 Feb, 2026
9 Feb, 2026
9 Feb, 2026
8 Feb, 2026
8 Feb, 2026
8 Feb, 2026
8 Feb, 2026
8 Feb, 2026
8 Feb, 2026
8 Feb, 2026
7 Feb, 2026
7 Feb, 2026
7 Feb, 2026
6 Feb, 2026
6 Feb, 2026
6 Feb, 2026
6 Feb, 2026
5 Feb, 2026
5 Feb, 2026
5 Feb, 2026
5 Feb, 2026
5 Feb, 2026
5 Feb, 2026
5 Feb, 2026
5 Feb, 2026
4 Feb, 2026
4 Feb, 2026
4 Feb, 2026
4 Feb, 2026
4 Feb, 2026
4 Feb, 2026
4 Feb, 2026
4 Feb, 2026
4 Feb, 2026
4 Feb, 2026
4 Feb, 2026
4 Feb, 2026
4 Feb, 2026
4 Feb, 2026
4 Feb, 2026
4 Feb, 2026
4 Feb, 2026
4 Feb, 2026
4 Feb, 2026
4 Feb, 2026
4 Feb, 2026
4 Feb, 2026
4 Feb, 2026
4 Feb, 2026
4 Feb, 2026
3 Feb, 2026
3 Feb, 2026
3 Feb, 2026
3 Feb, 2026
3 Feb, 2026
3 Feb, 2026
3 Feb, 2026
3 Feb, 2026
3 Feb, 2026
3 Feb, 2026
3 Feb, 2026
3 Feb, 2026
3 Feb, 2026
3 Feb, 2026
3 Feb, 2026
2 Feb, 2026
2 Feb, 2026
2 Feb, 2026
2 Feb, 2026
2 Feb, 2026
2 Feb, 2026
2 Feb, 2026
2 Feb, 2026
2 Feb, 2026
1 Feb, 2026
1 Feb, 2026
1 Feb, 2026
1 Feb, 2026
1 Feb, 2026
1 Feb, 2026
1 Feb, 2026
1 Feb, 2026
31 Jan, 2026
31 Jan, 2026
31 Jan, 2026
31 Jan, 2026
31 Jan, 2026
31 Jan, 2026
31 Jan, 2026
31 Jan, 2026
30 Jan, 2026
30 Jan, 2026
30 Jan, 2026
30 Jan, 2026
30 Jan, 2026
30 Jan, 2026
30 Jan, 2026
30 Jan, 2026
30 Jan, 2026
30 Jan, 2026
30 Jan, 2026
30 Jan, 2026
30 Jan, 2026
30 Jan, 2026
30 Jan, 2026
30 Jan, 2026
30 Jan, 2026
29 Jan, 2026
29 Jan, 2026
29 Jan, 2026
29 Jan, 2026
29 Jan, 2026
29 Jan, 2026
28 Jan, 2026
28 Jan, 2026
28 Jan, 2026
28 Jan, 2026
28 Jan, 2026
27 Jan, 2026
27 Jan, 2026
27 Jan, 2026
27 Jan, 2026
27 Jan, 2026
27 Jan, 2026
27 Jan, 2026
27 Jan, 2026
26 Jan, 2026
26 Jan, 2026
26 Jan, 2026
26 Jan, 2026
26 Jan, 2026
26 Jan, 2026
25 Jan, 2026
25 Jan, 2026
25 Jan, 2026
25 Jan, 2026
25 Jan, 2026
25 Jan, 2026
25 Jan, 2026
25 Jan, 2026
24 Jan, 2026
24 Jan, 2026
24 Jan, 2026
24 Jan, 2026
24 Jan, 2026
24 Jan, 2026
24 Jan, 2026
24 Jan, 2026
24 Jan, 2026
23 Jan, 2026
23 Jan, 2026
23 Jan, 2026
23 Jan, 2026
23 Jan, 2026
23 Jan, 2026
23 Jan, 2026
23 Jan, 2026
23 Jan, 2026
23 Jan, 2026
23 Jan, 2026
23 Jan, 2026
23 Jan, 2026
23 Jan, 2026
23 Jan, 2026
23 Jan, 2026
23 Jan, 2026
23 Jan, 2026
23 Jan, 2026
23 Jan, 2026
23 Jan, 2026
22 Jan, 2026
22 Jan, 2026
22 Jan, 2026
22 Jan, 2026
22 Jan, 2026
22 Jan, 2026
22 Jan, 2026
22 Jan, 2026
22 Jan, 2026
22 Jan, 2026
22 Jan, 2026
22 Jan, 2026
22 Jan, 2026
22 Jan, 2026
22 Jan, 2026
22 Jan, 2026
22 Jan, 2026
22 Jan, 2026
22 Jan, 2026
22 Jan, 2026
22 Jan, 2026
21 Jan, 2026
21 Jan, 2026
21 Jan, 2026
21 Jan, 2026
21 Jan, 2026
21 Jan, 2026
21 Jan, 2026
20 Jan, 2026
20 Jan, 2026
20 Jan, 2026
20 Jan, 2026
20 Jan, 2026
20 Jan, 2026
20 Jan, 2026
20 Jan, 2026
20 Jan, 2026
20 Jan, 2026
20 Jan, 2026
20 Jan, 2026
20 Jan, 2026
20 Jan, 2026
20 Jan, 2026
20 Jan, 2026
20 Jan, 2026
20 Jan, 2026
20 Jan, 2026
20 Jan, 2026
20 Jan, 2026
19 Jan, 2026
19 Jan, 2026
19 Jan, 2026
19 Jan, 2026
19 Jan, 2026
19 Jan, 2026
19 Jan, 2026
19 Jan, 2026
19 Jan, 2026
19 Jan, 2026
19 Jan, 2026
19 Jan, 2026
19 Jan, 2026
19 Jan, 2026
19 Jan, 2026
19 Jan, 2026
19 Jan, 2026
19 Jan, 2026
18 Jan, 2026
18 Jan, 2026
18 Jan, 2026
18 Jan, 2026
18 Jan, 2026
18 Jan, 2026
18 Jan, 2026
17 Jan, 2026
17 Jan, 2026
17 Jan, 2026
17 Jan, 2026
17 Jan, 2026
17 Jan, 2026
17 Jan, 2026
17 Jan, 2026
17 Jan, 2026
17 Jan, 2026
17 Jan, 2026
17 Jan, 2026
17 Jan, 2026
17 Jan, 2026
17 Jan, 2026
16 Jan, 2026
16 Jan, 2026
16 Jan, 2026
16 Jan, 2026
16 Jan, 2026
16 Jan, 2026
16 Jan, 2026
16 Jan, 2026
15 Jan, 2026
15 Jan, 2026
15 Jan, 2026
15 Jan, 2026
15 Jan, 2026
15 Jan, 2026
15 Jan, 2026
15 Jan, 2026
15 Jan, 2026
15 Jan, 2026
15 Jan, 2026
15 Jan, 2026
15 Jan, 2026
14 Jan, 2026
14 Jan, 2026
14 Jan, 2026
14 Jan, 2026
14 Jan, 2026
14 Jan, 2026
14 Jan, 2026
13 Jan, 2026
13 Jan, 2026
13 Jan, 2026
13 Jan, 2026
13 Jan, 2026
13 Jan, 2026
13 Jan, 2026
13 Jan, 2026
13 Jan, 2026
12 Jan, 2026
12 Jan, 2026
12 Jan, 2026
12 Jan, 2026
11 Jan, 2026
11 Jan, 2026
11 Jan, 2026
11 Jan, 2026
11 Jan, 2026
11 Jan, 2026
11 Jan, 2026
10 Jan, 2026
10 Jan, 2026
10 Jan, 2026
10 Jan, 2026
10 Jan, 2026
10 Jan, 2026
10 Jan, 2026
10 Jan, 2026
10 Jan, 2026
10 Jan, 2026
10 Jan, 2026
10 Jan, 2026
9 Jan, 2026
9 Jan, 2026
9 Jan, 2026
9 Jan, 2026
9 Jan, 2026
9 Jan, 2026
9 Jan, 2026
9 Jan, 2026
9 Jan, 2026
8 Jan, 2026
8 Jan, 2026
8 Jan, 2026
8 Jan, 2026
8 Jan, 2026
8 Jan, 2026
8 Jan, 2026
8 Jan, 2026
8 Jan, 2026
7 Jan, 2026
7 Jan, 2026
7 Jan, 2026
7 Jan, 2026
7 Jan, 2026
7 Jan, 2026
7 Jan, 2026
7 Jan, 2026
7 Jan, 2026
7 Jan, 2026
7 Jan, 2026
7 Jan, 2026
7 Jan, 2026
7 Jan, 2026
7 Jan, 2026
7 Jan, 2026
7 Jan, 2026
7 Jan, 2026
6 Jan, 2026
6 Jan, 2026
6 Jan, 2026
6 Jan, 2026
6 Jan, 2026
6 Jan, 2026
6 Jan, 2026
6 Jan, 2026
6 Jan, 2026
6 Jan, 2026
6 Jan, 2026
6 Jan, 2026
5 Jan, 2026
5 Jan, 2026
5 Jan, 2026
5 Jan, 2026
5 Jan, 2026
5 Jan, 2026
5 Jan, 2026
5 Jan, 2026
5 Jan, 2026
5 Jan, 2026
5 Jan, 2026
4 Jan, 2026
4 Jan, 2026
4 Jan, 2026
4 Jan, 2026
4 Jan, 2026
4 Jan, 2026
4 Jan, 2026
4 Jan, 2026
4 Jan, 2026
4 Jan, 2026
4 Jan, 2026
3 Jan, 2026
3 Jan, 2026
3 Jan, 2026
3 Jan, 2026
3 Jan, 2026
3 Jan, 2026
3 Jan, 2026
3 Jan, 2026
2 Jan, 2026
2 Jan, 2026
2 Jan, 2026
2 Jan, 2026
2 Jan, 2026
2 Jan, 2026
2 Jan, 2026
2 Jan, 2026
2 Jan, 2026
2 Jan, 2026
2 Jan, 2026
2 Jan, 2026
1 Jan, 2026
1 Jan, 2026
1 Jan, 2026
1 Jan, 2026
1 Jan, 2026
1 Jan, 2026
1 Jan, 2026
1 Jan, 2026
1 Jan, 2026
31 Dec, 2025
31 Dec, 2025
31 Dec, 2025
31 Dec, 2025
31 Dec, 2025
31 Dec, 2025
31 Dec, 2025
31 Dec, 2025
31 Dec, 2025
31 Dec, 2025
31 Dec, 2025
31 Dec, 2025
31 Dec, 2025
31 Dec, 2025
31 Dec, 2025
30 Dec, 2025
30 Dec, 2025
30 Dec, 2025
30 Dec, 2025
30 Dec, 2025
30 Dec, 2025
30 Dec, 2025
30 Dec, 2025
30 Dec, 2025
30 Dec, 2025
30 Dec, 2025
30 Dec, 2025
30 Dec, 2025
30 Dec, 2025
30 Dec, 2025
30 Dec, 2025
30 Dec, 2025
30 Dec, 2025
30 Dec, 2025
30 Dec, 2025
30 Dec, 2025
28 Dec, 2025
28 Dec, 2025
28 Dec, 2025
28 Dec, 2025
28 Dec, 2025
28 Dec, 2025
28 Dec, 2025
28 Dec, 2025
28 Dec, 2025
28 Dec, 2025
28 Dec, 2025
28 Dec, 2025
28 Dec, 2025
28 Dec, 2025
27 Dec, 2025
27 Dec, 2025
26 Dec, 2025
26 Dec, 2025
26 Dec, 2025
25 Dec, 2025
25 Dec, 2025
25 Dec, 2025
25 Dec, 2025
25 Dec, 2025
25 Dec, 2025
25 Dec, 2025
24 Dec, 2025
24 Dec, 2025
24 Dec, 2025
24 Dec, 2025
24 Dec, 2025
24 Dec, 2025
24 Dec, 2025
23 Dec, 2025
23 Dec, 2025
23 Dec, 2025
23 Dec, 2025
23 Dec, 2025
22 Dec, 2025
22 Dec, 2025
22 Dec, 2025
22 Dec, 2025
22 Dec, 2025
22 Dec, 2025
22 Dec, 2025
22 Dec, 2025
22 Dec, 2025
22 Dec, 2025
22 Dec, 2025
22 Dec, 2025
22 Dec, 2025
22 Dec, 2025
22 Dec, 2025
22 Dec, 2025
22 Dec, 2025
22 Dec, 2025
22 Dec, 2025
22 Dec, 2025
20 Dec, 2025
20 Dec, 2025
20 Dec, 2025
20 Dec, 2025
20 Dec, 2025
20 Dec, 2025
14 Dec, 2025
14 Dec, 2025
14 Dec, 2025
14 Dec, 2025
13 Dec, 2025
13 Dec, 2025
13 Dec, 2025
13 Dec, 2025
13 Dec, 2025
13 Dec, 2025
12 Dec, 2025
12 Dec, 2025
12 Dec, 2025
12 Dec, 2025
12 Dec, 2025
12 Dec, 2025
12 Dec, 2025
12 Dec, 2025
12 Dec, 2025
12 Dec, 2025
12 Dec, 2025
12 Dec, 2025
11 Dec, 2025
10 Dec, 2025
10 Dec, 2025
10 Dec, 2025
10 Dec, 2025
10 Dec, 2025
10 Dec, 2025
10 Dec, 2025
10 Dec, 2025
10 Dec, 2025
10 Dec, 2025
10 Dec, 2025
10 Dec, 2025
9 Dec, 2025
9 Dec, 2025
9 Dec, 2025
9 Dec, 2025
9 Dec, 2025
9 Dec, 2025
9 Dec, 2025
9 Dec, 2025
9 Dec, 2025
9 Dec, 2025
9 Dec, 2025
9 Dec, 2025
9 Dec, 2025
9 Dec, 2025
9 Dec, 2025
9 Dec, 2025
9 Dec, 2025
9 Dec, 2025
9 Dec, 2025
9 Dec, 2025
9 Dec, 2025
9 Dec, 2025
9 Dec, 2025
9 Dec, 2025
9 Dec, 2025
9 Dec, 2025
9 Dec, 2025
9 Dec, 2025
9 Dec, 2025
9 Dec, 2025
9 Dec, 2025
9 Dec, 2025
9 Dec, 2025
9 Dec, 2025
9 Dec, 2025
9 Dec, 2025
9 Dec, 2025
9 Dec, 2025
9 Dec, 2025
8 Dec, 2025
8 Dec, 2025
8 Dec, 2025
8 Dec, 2025
8 Dec, 2025
8 Dec, 2025
8 Dec, 2025
8 Dec, 2025
8 Dec, 2025
8 Dec, 2025
8 Dec, 2025
8 Dec, 2025
8 Dec, 2025
8 Dec, 2025
8 Dec, 2025
8 Dec, 2025
8 Dec, 2025
8 Dec, 2025
8 Dec, 2025
8 Dec, 2025
8 Dec, 2025
8 Dec, 2025
8 Dec, 2025
8 Dec, 2025
8 Dec, 2025
8 Dec, 2025
8 Dec, 2025
8 Dec, 2025
8 Dec, 2025
8 Dec, 2025
8 Dec, 2025
8 Dec, 2025
8 Dec, 2025
8 Dec, 2025
8 Dec, 2025
8 Dec, 2025
8 Dec, 2025
8 Dec, 2025
8 Dec, 2025
8 Dec, 2025
8 Dec, 2025
6 Dec, 2025
6 Dec, 2025
5 Dec, 2025
5 Dec, 2025
5 Dec, 2025
5 Dec, 2025
5 Dec, 2025
5 Dec, 2025
5 Dec, 2025
5 Dec, 2025
5 Dec, 2025
5 Dec, 2025
5 Dec, 2025
5 Dec, 2025
5 Dec, 2025
5 Dec, 2025
5 Dec, 2025
5 Dec, 2025
5 Dec, 2025
5 Dec, 2025
5 Dec, 2025
5 Dec, 2025
5 Dec, 2025
5 Dec, 2025
5 Dec, 2025
5 Dec, 2025
5 Dec, 2025
5 Dec, 2025
5 Dec, 2025
5 Dec, 2025
5 Dec, 2025
5 Dec, 2025
5 Dec, 2025
5 Dec, 2025
5 Dec, 2025
5 Dec, 2025
5 Dec, 2025
5 Dec, 2025
5 Dec, 2025
5 Dec, 2025
5 Dec, 2025
5 Dec, 2025
5 Dec, 2025
5 Dec, 2025
5 Dec, 2025
5 Dec, 2025
5 Dec, 2025
5 Dec, 2025
5 Dec, 2025
5 Dec, 2025
5 Dec, 2025
5 Dec, 2025
5 Dec, 2025
5 Dec, 2025
5 Dec, 2025
5 Dec, 2025
5 Dec, 2025
5 Dec, 2025
5 Dec, 2025
5 Dec, 2025
5 Dec, 2025
5 Dec, 2025
5 Dec, 2025
5 Dec, 2025
5 Dec, 2025
5 Dec, 2025
5 Dec, 2025
5 Dec, 2025
5 Dec, 2025
5 Dec, 2025
5 Dec, 2025
5 Dec, 2025
5 Dec, 2025
5 Dec, 2025
5 Dec, 2025
5 Dec, 2025
5 Dec, 2025
5 Dec, 2025
5 Dec, 2025
5 Dec, 2025
5 Dec, 2025
5 Dec, 2025
5 Dec, 2025
5 Dec, 2025
5 Dec, 2025
5 Dec, 2025
5 Dec, 2025
5 Dec, 2025
5 Dec, 2025
5 Dec, 2025
5 Dec, 2025
5 Dec, 2025
5 Dec, 2025
5 Dec, 2025
5 Dec, 2025
5 Dec, 2025
5 Dec, 2025
4 Dec, 2025
4 Dec, 2025
4 Dec, 2025
4 Dec, 2025
4 Dec, 2025
4 Dec, 2025
4 Dec, 2025
4 Dec, 2025
4 Dec, 2025
4 Dec, 2025
4 Dec, 2025
4 Dec, 2025
4 Dec, 2025
4 Dec, 2025
4 Dec, 2025
4 Dec, 2025
4 Dec, 2025
4 Dec, 2025
4 Dec, 2025
4 Dec, 2025
4 Dec, 2025
4 Dec, 2025
4 Dec, 2025
4 Dec, 2025
4 Dec, 2025
4 Dec, 2025
4 Dec, 2025
4 Dec, 2025
4 Dec, 2025
4 Dec, 2025
4 Dec, 2025
3 Dec, 2025
3 Dec, 2025
3 Dec, 2025
3 Dec, 2025
3 Dec, 2025
3 Dec, 2025
3 Dec, 2025
3 Dec, 2025
3 Dec, 2025
3 Dec, 2025
3 Dec, 2025
3 Dec, 2025
3 Dec, 2025
3 Dec, 2025
3 Dec, 2025
3 Dec, 2025
3 Dec, 2025
3 Dec, 2025
3 Dec, 2025
3 Dec, 2025
3 Dec, 2025
3 Dec, 2025
2 Dec, 2025
2 Dec, 2025
2 Dec, 2025
2 Dec, 2025
2 Dec, 2025
2 Dec, 2025
2 Dec, 2025
2 Dec, 2025
2 Dec, 2025
1 Dec, 2025
1 Dec, 2025
1 Dec, 2025
1 Dec, 2025
1 Dec, 2025
1 Dec, 2025
1 Dec, 2025
1 Dec, 2025
1 Dec, 2025
1 Dec, 2025
1 Dec, 2025
30 Nov, 2025
30 Nov, 2025
30 Nov, 2025
30 Nov, 2025
30 Nov, 2025
30 Nov, 2025
30 Nov, 2025
30 Nov, 2025
30 Nov, 2025
30 Nov, 2025
30 Nov, 2025
30 Nov, 2025
30 Nov, 2025
30 Nov, 2025
30 Nov, 2025
30 Nov, 2025
29 Nov, 2025
29 Nov, 2025
29 Nov, 2025
29 Nov, 2025
29 Nov, 2025
29 Nov, 2025
29 Nov, 2025
29 Nov, 2025
29 Nov, 2025
29 Nov, 2025
29 Nov, 2025
29 Nov, 2025
29 Nov, 2025
29 Nov, 2025
28 Nov, 2025
28 Nov, 2025
28 Nov, 2025
28 Nov, 2025
28 Nov, 2025
28 Nov, 2025
28 Nov, 2025
28 Nov, 2025
28 Nov, 2025
28 Nov, 2025
28 Nov, 2025
28 Nov, 2025
28 Nov, 2025
28 Nov, 2025
28 Nov, 2025
28 Nov, 2025
28 Nov, 2025
28 Nov, 2025
28 Nov, 2025
28 Nov, 2025
28 Nov, 2025
28 Nov, 2025
28 Nov, 2025
28 Nov, 2025
28 Nov, 2025
28 Nov, 2025
28 Nov, 2025
28 Nov, 2025
28 Nov, 2025
28 Nov, 2025
28 Nov, 2025
28 Nov, 2025
28 Nov, 2025
28 Nov, 2025
28 Nov, 2025
28 Nov, 2025
28 Nov, 2025
28 Nov, 2025
28 Nov, 2025
28 Nov, 2025
28 Nov, 2025
28 Nov, 2025
28 Nov, 2025
28 Nov, 2025
28 Nov, 2025
28 Nov, 2025
28 Nov, 2025
28 Nov, 2025
28 Nov, 2025
28 Nov, 2025
28 Nov, 2025
28 Nov, 2025
28 Nov, 2025
28 Nov, 2025
28 Nov, 2025
28 Nov, 2025
28 Nov, 2025
28 Nov, 2025
28 Nov, 2025
28 Nov, 2025
28 Nov, 2025
28 Nov, 2025
28 Nov, 2025
28 Nov, 2025
28 Nov, 2025
28 Nov, 2025
28 Nov, 2025
28 Nov, 2025
28 Nov, 2025
28 Nov, 2025
28 Nov, 2025
28 Nov, 2025
28 Nov, 2025
28 Nov, 2025
28 Nov, 2025
28 Nov, 2025
28 Nov, 2025
28 Nov, 2025
28 Nov, 2025
28 Nov, 2025
28 Nov, 2025
28 Nov, 2025
28 Nov, 2025
28 Nov, 2025
28 Nov, 2025
28 Nov, 2025
27 Nov, 2025
27 Nov, 2025
27 Nov, 2025
27 Nov, 2025
27 Nov, 2025
27 Nov, 2025
27 Nov, 2025
27 Nov, 2025
26 Nov, 2025
26 Nov, 2025
26 Nov, 2025
26 Nov, 2025
26 Nov, 2025
26 Nov, 2025
26 Nov, 2025
26 Nov, 2025
26 Nov, 2025
26 Nov, 2025
26 Nov, 2025
26 Nov, 2025
26 Nov, 2025
26 Nov, 2025
26 Nov, 2025
26 Nov, 2025
26 Nov, 2025
26 Nov, 2025
26 Nov, 2025
26 Nov, 2025
26 Nov, 2025
26 Nov, 2025
25 Nov, 2025
25 Nov, 2025
25 Nov, 2025
25 Nov, 2025
25 Nov, 2025
25 Nov, 2025
25 Nov, 2025
25 Nov, 2025
25 Nov, 2025
25 Nov, 2025
25 Nov, 2025
25 Nov, 2025
25 Nov, 2025
25 Nov, 2025
25 Nov, 2025
25 Nov, 2025
25 Nov, 2025
25 Nov, 2025
25 Nov, 2025
25 Nov, 2025
25 Nov, 2025
25 Nov, 2025
25 Nov, 2025
25 Nov, 2025
25 Nov, 2025
25 Nov, 2025
25 Nov, 2025
25 Nov, 2025
25 Nov, 2025
25 Nov, 2025
25 Nov, 2025
25 Nov, 2025
25 Nov, 2025
24 Nov, 2025
24 Nov, 2025
24 Nov, 2025
23 Nov, 2025
23 Nov, 2025
23 Nov, 2025
23 Nov, 2025
23 Nov, 2025
23 Nov, 2025
23 Nov, 2025
23 Nov, 2025
23 Nov, 2025
23 Nov, 2025
23 Nov, 2025
23 Nov, 2025
23 Nov, 2025
22 Nov, 2025
22 Nov, 2025
22 Nov, 2025
22 Nov, 2025
22 Nov, 2025
22 Nov, 2025
22 Nov, 2025
22 Nov, 2025
22 Nov, 2025
22 Nov, 2025
22 Nov, 2025
22 Nov, 2025
22 Nov, 2025
22 Nov, 2025
22 Nov, 2025
22 Nov, 2025
22 Nov, 2025
22 Nov, 2025
22 Nov, 2025
22 Nov, 2025
22 Nov, 2025
22 Nov, 2025
22 Nov, 2025
22 Nov, 2025
22 Nov, 2025
22 Nov, 2025
22 Nov, 2025
22 Nov, 2025
22 Nov, 2025
22 Nov, 2025
22 Nov, 2025
22 Nov, 2025
22 Nov, 2025
22 Nov, 2025
22 Nov, 2025
22 Nov, 2025
22 Nov, 2025
22 Nov, 2025
22 Nov, 2025
21 Nov, 2025
21 Nov, 2025
21 Nov, 2025
21 Nov, 2025
21 Nov, 2025
21 Nov, 2025
21 Nov, 2025
21 Nov, 2025
21 Nov, 2025
21 Nov, 2025
21 Nov, 2025
21 Nov, 2025
21 Nov, 2025
21 Nov, 2025
21 Nov, 2025
21 Nov, 2025
21 Nov, 2025
21 Nov, 2025
21 Nov, 2025
21 Nov, 2025
21 Nov, 2025
21 Nov, 2025
21 Nov, 2025
21 Nov, 2025
21 Nov, 2025
21 Nov, 2025
21 Nov, 2025
21 Nov, 2025
21 Nov, 2025
21 Nov, 2025
21 Nov, 2025
21 Nov, 2025
21 Nov, 2025
21 Nov, 2025
21 Nov, 2025
21 Nov, 2025
21 Nov, 2025
21 Nov, 2025
21 Nov, 2025
21 Nov, 2025
21 Nov, 2025
21 Nov, 2025
21 Nov, 2025
21 Nov, 2025
21 Nov, 2025
20 Nov, 2025
20 Nov, 2025
20 Nov, 2025
20 Nov, 2025
20 Nov, 2025
20 Nov, 2025
20 Nov, 2025
20 Nov, 2025
20 Nov, 2025
20 Nov, 2025
19 Nov, 2025
19 Nov, 2025
19 Nov, 2025
19 Nov, 2025
19 Nov, 2025
19 Nov, 2025
19 Nov, 2025
19 Nov, 2025
19 Nov, 2025
19 Nov, 2025
19 Nov, 2025
19 Nov, 2025
19 Nov, 2025
19 Nov, 2025
19 Nov, 2025
19 Nov, 2025
19 Nov, 2025
19 Nov, 2025
18 Nov, 2025
18 Nov, 2025
18 Nov, 2025
18 Nov, 2025
18 Nov, 2025
18 Nov, 2025
18 Nov, 2025
18 Nov, 2025
18 Nov, 2025
18 Nov, 2025
18 Nov, 2025
18 Nov, 2025
18 Nov, 2025
18 Nov, 2025
18 Nov, 2025
18 Nov, 2025
18 Nov, 2025
18 Nov, 2025
18 Nov, 2025
18 Nov, 2025
18 Nov, 2025
18 Nov, 2025
18 Nov, 2025
18 Nov, 2025
18 Nov, 2025
18 Nov, 2025
18 Nov, 2025
18 Nov, 2025
18 Nov, 2025
18 Nov, 2025
18 Nov, 2025
18 Nov, 2025
18 Nov, 2025
18 Nov, 2025
18 Nov, 2025
18 Nov, 2025
18 Nov, 2025
18 Nov, 2025
18 Nov, 2025
18 Nov, 2025
18 Nov, 2025
18 Nov, 2025
18 Nov, 2025
18 Nov, 2025
18 Nov, 2025
18 Nov, 2025
18 Nov, 2025
18 Nov, 2025
18 Nov, 2025
18 Nov, 2025
18 Nov, 2025
18 Nov, 2025
18 Nov, 2025
18 Nov, 2025
18 Nov, 2025
18 Nov, 2025
18 Nov, 2025
18 Nov, 2025
18 Nov, 2025
18 Nov, 2025
18 Nov, 2025
18 Nov, 2025
18 Nov, 2025
18 Nov, 2025
18 Nov, 2025
18 Nov, 2025
18 Nov, 2025
18 Nov, 2025
18 Nov, 2025
18 Nov, 2025
18 Nov, 2025
18 Nov, 2025
18 Nov, 2025
18 Nov, 2025
18 Nov, 2025
18 Nov, 2025
18 Nov, 2025
18 Nov, 2025
18 Nov, 2025
18 Nov, 2025
18 Nov, 2025
18 Nov, 2025
18 Nov, 2025
18 Nov, 2025
18 Nov, 2025
18 Nov, 2025
18 Nov, 2025
18 Nov, 2025
18 Nov, 2025
18 Nov, 2025
18 Nov, 2025
18 Nov, 2025
18 Nov, 2025
18 Nov, 2025
18 Nov, 2025
18 Nov, 2025
18 Nov, 2025
18 Nov, 2025
18 Nov, 2025
18 Nov, 2025
18 Nov, 2025
18 Nov, 2025
17 Nov, 2025
17 Nov, 2025
17 Nov, 2025
17 Nov, 2025
17 Nov, 2025
17 Nov, 2025
17 Nov, 2025
17 Nov, 2025
17 Nov, 2025
17 Nov, 2025
17 Nov, 2025
17 Nov, 2025
17 Nov, 2025
17 Nov, 2025
17 Nov, 2025
17 Nov, 2025
17 Nov, 2025
17 Nov, 2025
17 Nov, 2025
17 Nov, 2025
17 Nov, 2025
17 Nov, 2025
17 Nov, 2025
17 Nov, 2025
17 Nov, 2025
17 Nov, 2025
17 Nov, 2025
17 Nov, 2025
17 Nov, 2025
17 Nov, 2025
17 Nov, 2025
17 Nov, 2025
17 Nov, 2025
17 Nov, 2025
17 Nov, 2025
17 Nov, 2025
17 Nov, 2025
17 Nov, 2025
17 Nov, 2025
17 Nov, 2025
17 Nov, 2025
17 Nov, 2025
17 Nov, 2025
17 Nov, 2025
17 Nov, 2025
17 Nov, 2025
17 Nov, 2025
17 Nov, 2025
17 Nov, 2025
17 Nov, 2025
17 Nov, 2025
17 Nov, 2025
17 Nov, 2025
17 Nov, 2025
16 Nov, 2025
16 Nov, 2025
16 Nov, 2025
16 Nov, 2025
16 Nov, 2025
16 Nov, 2025
16 Nov, 2025
16 Nov, 2025
16 Nov, 2025
16 Nov, 2025
16 Nov, 2025
16 Nov, 2025
15 Nov, 2025
15 Nov, 2025
14 Nov, 2025
14 Nov, 2025
14 Nov, 2025
14 Nov, 2025
14 Nov, 2025
14 Nov, 2025
14 Nov, 2025
14 Nov, 2025
14 Nov, 2025
14 Nov, 2025
14 Nov, 2025
14 Nov, 2025
14 Nov, 2025
14 Nov, 2025
14 Nov, 2025
14 Nov, 2025
14 Nov, 2025
14 Nov, 2025
14 Nov, 2025
14 Nov, 2025
14 Nov, 2025
14 Nov, 2025
14 Nov, 2025
14 Nov, 2025
14 Nov, 2025
14 Nov, 2025
14 Nov, 2025
14 Nov, 2025
14 Nov, 2025
14 Nov, 2025
14 Nov, 2025
14 Nov, 2025
14 Nov, 2025
14 Nov, 2025
14 Nov, 2025
14 Nov, 2025
14 Nov, 2025
14 Nov, 2025
14 Nov, 2025
14 Nov, 2025
14 Nov, 2025
14 Nov, 2025
14 Nov, 2025
14 Nov, 2025
14 Nov, 2025
14 Nov, 2025
14 Nov, 2025
14 Nov, 2025
14 Nov, 2025
14 Nov, 2025
14 Nov, 2025
14 Nov, 2025
14 Nov, 2025
14 Nov, 2025
14 Nov, 2025
14 Nov, 2025
14 Nov, 2025
14 Nov, 2025
14 Nov, 2025
14 Nov, 2025
14 Nov, 2025
14 Nov, 2025
14 Nov, 2025
14 Nov, 2025
14 Nov, 2025
14 Nov, 2025
14 Nov, 2025
14 Nov, 2025
14 Nov, 2025
14 Nov, 2025
14 Nov, 2025
14 Nov, 2025
14 Nov, 2025
14 Nov, 2025
14 Nov, 2025
14 Nov, 2025
14 Nov, 2025
14 Nov, 2025
14 Nov, 2025
14 Nov, 2025
14 Nov, 2025
14 Nov, 2025
14 Nov, 2025
14 Nov, 2025
14 Nov, 2025
14 Nov, 2025
14 Nov, 2025
14 Nov, 2025
14 Nov, 2025
14 Nov, 2025
14 Nov, 2025
14 Nov, 2025
14 Nov, 2025
13 Nov, 2025
13 Nov, 2025
13 Nov, 2025
13 Nov, 2025
13 Nov, 2025
13 Nov, 2025
13 Nov, 2025
13 Nov, 2025
13 Nov, 2025
13 Nov, 2025
13 Nov, 2025
13 Nov, 2025
13 Nov, 2025
13 Nov, 2025
13 Nov, 2025
13 Nov, 2025
13 Nov, 2025
13 Nov, 2025
13 Nov, 2025
13 Nov, 2025
13 Nov, 2025
13 Nov, 2025
13 Nov, 2025
13 Nov, 2025
13 Nov, 2025
13 Nov, 2025
13 Nov, 2025
13 Nov, 2025
13 Nov, 2025
13 Nov, 2025
13 Nov, 2025
13 Nov, 2025
13 Nov, 2025
13 Nov, 2025
12 Nov, 2025
12 Nov, 2025
12 Nov, 2025
12 Nov, 2025
12 Nov, 2025
12 Nov, 2025
12 Nov, 2025
12 Nov, 2025
12 Nov, 2025
12 Nov, 2025
12 Nov, 2025
12 Nov, 2025
12 Nov, 2025
12 Nov, 2025
12 Nov, 2025
12 Nov, 2025
12 Nov, 2025
12 Nov, 2025
12 Nov, 2025
12 Nov, 2025
12 Nov, 2025
12 Nov, 2025
12 Nov, 2025
12 Nov, 2025
12 Nov, 2025
12 Nov, 2025
12 Nov, 2025
12 Nov, 2025
12 Nov, 2025
12 Nov, 2025
12 Nov, 2025
12 Nov, 2025
12 Nov, 2025
12 Nov, 2025
12 Nov, 2025
12 Nov, 2025
12 Nov, 2025
12 Nov, 2025
12 Nov, 2025
12 Nov, 2025
12 Nov, 2025
12 Nov, 2025
12 Nov, 2025
12 Nov, 2025
12 Nov, 2025
12 Nov, 2025
12 Nov, 2025
12 Nov, 2025
12 Nov, 2025
12 Nov, 2025
12 Nov, 2025
12 Nov, 2025
12 Nov, 2025
12 Nov, 2025
12 Nov, 2025
12 Nov, 2025
12 Nov, 2025
12 Nov, 2025
12 Nov, 2025
12 Nov, 2025
12 Nov, 2025
12 Nov, 2025
12 Nov, 2025
12 Nov, 2025
12 Nov, 2025
12 Nov, 2025
12 Nov, 2025
12 Nov, 2025
12 Nov, 2025
12 Nov, 2025
11 Nov, 2025
11 Nov, 2025
11 Nov, 2025
11 Nov, 2025
10 Nov, 2025
10 Nov, 2025
10 Nov, 2025
9 Nov, 2025
9 Nov, 2025
9 Nov, 2025
9 Nov, 2025
9 Nov, 2025
9 Nov, 2025
9 Nov, 2025
9 Nov, 2025
9 Nov, 2025
9 Nov, 2025
8 Nov, 2025
8 Nov, 2025
8 Nov, 2025
8 Nov, 2025
8 Nov, 2025
8 Nov, 2025
8 Nov, 2025
8 Nov, 2025
8 Nov, 2025
8 Nov, 2025
8 Nov, 2025
8 Nov, 2025
8 Nov, 2025
8 Nov, 2025
8 Nov, 2025
8 Nov, 2025
8 Nov, 2025
8 Nov, 2025
8 Nov, 2025
8 Nov, 2025
8 Nov, 2025
8 Nov, 2025
8 Nov, 2025
8 Nov, 2025
8 Nov, 2025
8 Nov, 2025
8 Nov, 2025
8 Nov, 2025
8 Nov, 2025
8 Nov, 2025
8 Nov, 2025
8 Nov, 2025
8 Nov, 2025
8 Nov, 2025
8 Nov, 2025
8 Nov, 2025
8 Nov, 2025
8 Nov, 2025
8 Nov, 2025
8 Nov, 2025
8 Nov, 2025
7 Nov, 2025
7 Nov, 2025
7 Nov, 2025
7 Nov, 2025
7 Nov, 2025
7 Nov, 2025
7 Nov, 2025
7 Nov, 2025
7 Nov, 2025
7 Nov, 2025
7 Nov, 2025
7 Nov, 2025
7 Nov, 2025
7 Nov, 2025
7 Nov, 2025
7 Nov, 2025
7 Nov, 2025
7 Nov, 2025
7 Nov, 2025
7 Nov, 2025
7 Nov, 2025
7 Nov, 2025
7 Nov, 2025
7 Nov, 2025
7 Nov, 2025
7 Nov, 2025
7 Nov, 2025
7 Nov, 2025
7 Nov, 2025
7 Nov, 2025
7 Nov, 2025
7 Nov, 2025
7 Nov, 2025
7 Nov, 2025
7 Nov, 2025
7 Nov, 2025
7 Nov, 2025
7 Nov, 2025
7 Nov, 2025
7 Nov, 2025
7 Nov, 2025
7 Nov, 2025
7 Nov, 2025
7 Nov, 2025
7 Nov, 2025
7 Nov, 2025
7 Nov, 2025
7 Nov, 2025
7 Nov, 2025
7 Nov, 2025
7 Nov, 2025
7 Nov, 2025
7 Nov, 2025
7 Nov, 2025
7 Nov, 2025
7 Nov, 2025
7 Nov, 2025
7 Nov, 2025
6 Nov, 2025
6 Nov, 2025
6 Nov, 2025
6 Nov, 2025
6 Nov, 2025
6 Nov, 2025
5 Nov, 2025
5 Nov, 2025
5 Nov, 2025
4 Nov, 2025
4 Nov, 2025
4 Nov, 2025
4 Nov, 2025
4 Nov, 2025
4 Nov, 2025
4 Nov, 2025
4 Nov, 2025
4 Nov, 2025
4 Nov, 2025
4 Nov, 2025
4 Nov, 2025
4 Nov, 2025
4 Nov, 2025
4 Nov, 2025
4 Nov, 2025
4 Nov, 2025
4 Nov, 2025
4 Nov, 2025
4 Nov, 2025
4 Nov, 2025
4 Nov, 2025
4 Nov, 2025
4 Nov, 2025
4 Nov, 2025
4 Nov, 2025
4 Nov, 2025
4 Nov, 2025
4 Nov, 2025
4 Nov, 2025
4 Nov, 2025
4 Nov, 2025
4 Nov, 2025
4 Nov, 2025
4 Nov, 2025
4 Nov, 2025
4 Nov, 2025
4 Nov, 2025
4 Nov, 2025
4 Nov, 2025
4 Nov, 2025
4 Nov, 2025
3 Nov, 2025
3 Nov, 2025
3 Nov, 2025
3 Nov, 2025
3 Nov, 2025
3 Nov, 2025
3 Nov, 2025
3 Nov, 2025
3 Nov, 2025
3 Nov, 2025
3 Nov, 2025
3 Nov, 2025
3 Nov, 2025
3 Nov, 2025
3 Nov, 2025
3 Nov, 2025
3 Nov, 2025
3 Nov, 2025
3 Nov, 2025
3 Nov, 2025
3 Nov, 2025
3 Nov, 2025
3 Nov, 2025
3 Nov, 2025
3 Nov, 2025
3 Nov, 2025
3 Nov, 2025
3 Nov, 2025
3 Nov, 2025
3 Nov, 2025
3 Nov, 2025
3 Nov, 2025
3 Nov, 2025
3 Nov, 2025
3 Nov, 2025
3 Nov, 2025
3 Nov, 2025
3 Nov, 2025
3 Nov, 2025
3 Nov, 2025
3 Nov, 2025
2 Nov, 2025
2 Nov, 2025
2 Nov, 2025
2 Nov, 2025
2 Nov, 2025
2 Nov, 2025
2 Nov, 2025
2 Nov, 2025
2 Nov, 2025
2 Nov, 2025
31 Oct, 2025
31 Oct, 2025
31 Oct, 2025
31 Oct, 2025
31 Oct, 2025
31 Oct, 2025
31 Oct, 2025
31 Oct, 2025
31 Oct, 2025
31 Oct, 2025
30 Oct, 2025
30 Oct, 2025
30 Oct, 2025
30 Oct, 2025
30 Oct, 2025
30 Oct, 2025
30 Oct, 2025
30 Oct, 2025
30 Oct, 2025
30 Oct, 2025
30 Oct, 2025
30 Oct, 2025
29 Oct, 2025
29 Oct, 2025
29 Oct, 2025
29 Oct, 2025
29 Oct, 2025
29 Oct, 2025
29 Oct, 2025
29 Oct, 2025
29 Oct, 2025
29 Oct, 2025
29 Oct, 2025
29 Oct, 2025
29 Oct, 2025
29 Oct, 2025
29 Oct, 2025
29 Oct, 2025
29 Oct, 2025
29 Oct, 2025
29 Oct, 2025
29 Oct, 2025
29 Oct, 2025
29 Oct, 2025
29 Oct, 2025
29 Oct, 2025
29 Oct, 2025
29 Oct, 2025
29 Oct, 2025
29 Oct, 2025
29 Oct, 2025
29 Oct, 2025
29 Oct, 2025
29 Oct, 2025
29 Oct, 2025
29 Oct, 2025
29 Oct, 2025
29 Oct, 2025
29 Oct, 2025
29 Oct, 2025
29 Oct, 2025
29 Oct, 2025
29 Oct, 2025
29 Oct, 2025
29 Oct, 2025
29 Oct, 2025
29 Oct, 2025
29 Oct, 2025
29 Oct, 2025
29 Oct, 2025
29 Oct, 2025
29 Oct, 2025
29 Oct, 2025
29 Oct, 2025
29 Oct, 2025
29 Oct, 2025
29 Oct, 2025
29 Oct, 2025
29 Oct, 2025
29 Oct, 2025
29 Oct, 2025
29 Oct, 2025
29 Oct, 2025
29 Oct, 2025
29 Oct, 2025
29 Oct, 2025
29 Oct, 2025
29 Oct, 2025
29 Oct, 2025
29 Oct, 2025
29 Oct, 2025
29 Oct, 2025
29 Oct, 2025
29 Oct, 2025
28 Oct, 2025
28 Oct, 2025
28 Oct, 2025
28 Oct, 2025
28 Oct, 2025
28 Oct, 2025
28 Oct, 2025
28 Oct, 2025
28 Oct, 2025
28 Oct, 2025
28 Oct, 2025
28 Oct, 2025
28 Oct, 2025
28 Oct, 2025
28 Oct, 2025
28 Oct, 2025
28 Oct, 2025
28 Oct, 2025
28 Oct, 2025
28 Oct, 2025
28 Oct, 2025
28 Oct, 2025
28 Oct, 2025
28 Oct, 2025
28 Oct, 2025
28 Oct, 2025
28 Oct, 2025
28 Oct, 2025
28 Oct, 2025
28 Oct, 2025
28 Oct, 2025
28 Oct, 2025
28 Oct, 2025
27 Oct, 2025
27 Oct, 2025
27 Oct, 2025
27 Oct, 2025
27 Oct, 2025
27 Oct, 2025
27 Oct, 2025
27 Oct, 2025
27 Oct, 2025
27 Oct, 2025
27 Oct, 2025
27 Oct, 2025
27 Oct, 2025
27 Oct, 2025
27 Oct, 2025
27 Oct, 2025
27 Oct, 2025
27 Oct, 2025
27 Oct, 2025
27 Oct, 2025
27 Oct, 2025
27 Oct, 2025
27 Oct, 2025
27 Oct, 2025
27 Oct, 2025
27 Oct, 2025
27 Oct, 2025
27 Oct, 2025
27 Oct, 2025
27 Oct, 2025
27 Oct, 2025
27 Oct, 2025
26 Oct, 2025
26 Oct, 2025
26 Oct, 2025
26 Oct, 2025
26 Oct, 2025
26 Oct, 2025
26 Oct, 2025
26 Oct, 2025
26 Oct, 2025
26 Oct, 2025
26 Oct, 2025
26 Oct, 2025
26 Oct, 2025
26 Oct, 2025
26 Oct, 2025
26 Oct, 2025
26 Oct, 2025
26 Oct, 2025
26 Oct, 2025
26 Oct, 2025
26 Oct, 2025
26 Oct, 2025
26 Oct, 2025
26 Oct, 2025
26 Oct, 2025
26 Oct, 2025
26 Oct, 2025
26 Oct, 2025
26 Oct, 2025
26 Oct, 2025
26 Oct, 2025
26 Oct, 2025
26 Oct, 2025
26 Oct, 2025
26 Oct, 2025
26 Oct, 2025
26 Oct, 2025
26 Oct, 2025
26 Oct, 2025
26 Oct, 2025
26 Oct, 2025
26 Oct, 2025
26 Oct, 2025
26 Oct, 2025
26 Oct, 2025
26 Oct, 2025
26 Oct, 2025
26 Oct, 2025
26 Oct, 2025
26 Oct, 2025
26 Oct, 2025
26 Oct, 2025
26 Oct, 2025
26 Oct, 2025
26 Oct, 2025
26 Oct, 2025
26 Oct, 2025
26 Oct, 2025
26 Oct, 2025
26 Oct, 2025
25 Oct, 2025
25 Oct, 2025
25 Oct, 2025
25 Oct, 2025
25 Oct, 2025
25 Oct, 2025
25 Oct, 2025
25 Oct, 2025
25 Oct, 2025
25 Oct, 2025
25 Oct, 2025
25 Oct, 2025
25 Oct, 2025
25 Oct, 2025
25 Oct, 2025
25 Oct, 2025
25 Oct, 2025
25 Oct, 2025
25 Oct, 2025
25 Oct, 2025
25 Oct, 2025
25 Oct, 2025
25 Oct, 2025
25 Oct, 2025
25 Oct, 2025
25 Oct, 2025
25 Oct, 2025
25 Oct, 2025
25 Oct, 2025
25 Oct, 2025
25 Oct, 2025
25 Oct, 2025
25 Oct, 2025
25 Oct, 2025
25 Oct, 2025
25 Oct, 2025
25 Oct, 2025
25 Oct, 2025
25 Oct, 2025
25 Oct, 2025
25 Oct, 2025
25 Oct, 2025
25 Oct, 2025
25 Oct, 2025
25 Oct, 2025
25 Oct, 2025
24 Oct, 2025
24 Oct, 2025
24 Oct, 2025
24 Oct, 2025
24 Oct, 2025
24 Oct, 2025
24 Oct, 2025
24 Oct, 2025
24 Oct, 2025
24 Oct, 2025
24 Oct, 2025
24 Oct, 2025
24 Oct, 2025
23 Oct, 2025
23 Oct, 2025
23 Oct, 2025
23 Oct, 2025
22 Oct, 2025
22 Oct, 2025
22 Oct, 2025
22 Oct, 2025
22 Oct, 2025
22 Oct, 2025
22 Oct, 2025
22 Oct, 2025
22 Oct, 2025
22 Oct, 2025
22 Oct, 2025
21 Oct, 2025
21 Oct, 2025
21 Oct, 2025
21 Oct, 2025
21 Oct, 2025
21 Oct, 2025
21 Oct, 2025
21 Oct, 2025
21 Oct, 2025
21 Oct, 2025
21 Oct, 2025
21 Oct, 2025
21 Oct, 2025
21 Oct, 2025
21 Oct, 2025
21 Oct, 2025
21 Oct, 2025
21 Oct, 2025
21 Oct, 2025
21 Oct, 2025
21 Oct, 2025
21 Oct, 2025
21 Oct, 2025
21 Oct, 2025
21 Oct, 2025
21 Oct, 2025
21 Oct, 2025
21 Oct, 2025
21 Oct, 2025
21 Oct, 2025
21 Oct, 2025
21 Oct, 2025
21 Oct, 2025
21 Oct, 2025
21 Oct, 2025
21 Oct, 2025
21 Oct, 2025
21 Oct, 2025
21 Oct, 2025
21 Oct, 2025
21 Oct, 2025
21 Oct, 2025
21 Oct, 2025
21 Oct, 2025
21 Oct, 2025
21 Oct, 2025
21 Oct, 2025
21 Oct, 2025
21 Oct, 2025
21 Oct, 2025
21 Oct, 2025
21 Oct, 2025
20 Oct, 2025
20 Oct, 2025
20 Oct, 2025
20 Oct, 2025
20 Oct, 2025
20 Oct, 2025
20 Oct, 2025
20 Oct, 2025
20 Oct, 2025
20 Oct, 2025
20 Oct, 2025
20 Oct, 2025
20 Oct, 2025
19 Oct, 2025
19 Oct, 2025
19 Oct, 2025
19 Oct, 2025
19 Oct, 2025
19 Oct, 2025
19 Oct, 2025
19 Oct, 2025
19 Oct, 2025
19 Oct, 2025
19 Oct, 2025
18 Oct, 2025
18 Oct, 2025
18 Oct, 2025
18 Oct, 2025
18 Oct, 2025
18 Oct, 2025
18 Oct, 2025
18 Oct, 2025
18 Oct, 2025
18 Oct, 2025
18 Oct, 2025
18 Oct, 2025
18 Oct, 2025
18 Oct, 2025
18 Oct, 2025
18 Oct, 2025
18 Oct, 2025
17 Oct, 2025
17 Oct, 2025
17 Oct, 2025
17 Oct, 2025
17 Oct, 2025
17 Oct, 2025
17 Oct, 2025
17 Oct, 2025
17 Oct, 2025
17 Oct, 2025
17 Oct, 2025
17 Oct, 2025
17 Oct, 2025
17 Oct, 2025
17 Oct, 2025
17 Oct, 2025
17 Oct, 2025
17 Oct, 2025
17 Oct, 2025
17 Oct, 2025
17 Oct, 2025
17 Oct, 2025
17 Oct, 2025
17 Oct, 2025
17 Oct, 2025
17 Oct, 2025
17 Oct, 2025
17 Oct, 2025
17 Oct, 2025
17 Oct, 2025
17 Oct, 2025
17 Oct, 2025
17 Oct, 2025
17 Oct, 2025
17 Oct, 2025
17 Oct, 2025
17 Oct, 2025
17 Oct, 2025
17 Oct, 2025
17 Oct, 2025
17 Oct, 2025
17 Oct, 2025
17 Oct, 2025
17 Oct, 2025
17 Oct, 2025
17 Oct, 2025
17 Oct, 2025
17 Oct, 2025
17 Oct, 2025
16 Oct, 2025
16 Oct, 2025
16 Oct, 2025
16 Oct, 2025
16 Oct, 2025
16 Oct, 2025
16 Oct, 2025
16 Oct, 2025
16 Oct, 2025
16 Oct, 2025
16 Oct, 2025
16 Oct, 2025
16 Oct, 2025
16 Oct, 2025
16 Oct, 2025
16 Oct, 2025
16 Oct, 2025
16 Oct, 2025
16 Oct, 2025
16 Oct, 2025
16 Oct, 2025
16 Oct, 2025
16 Oct, 2025
16 Oct, 2025
16 Oct, 2025
16 Oct, 2025
16 Oct, 2025
16 Oct, 2025
16 Oct, 2025
16 Oct, 2025
16 Oct, 2025
16 Oct, 2025
16 Oct, 2025
16 Oct, 2025
16 Oct, 2025
16 Oct, 2025
16 Oct, 2025
16 Oct, 2025
16 Oct, 2025
15 Oct, 2025
15 Oct, 2025
15 Oct, 2025
15 Oct, 2025
15 Oct, 2025
15 Oct, 2025
15 Oct, 2025
15 Oct, 2025
15 Oct, 2025
15 Oct, 2025
15 Oct, 2025
15 Oct, 2025
15 Oct, 2025
15 Oct, 2025
15 Oct, 2025
15 Oct, 2025
15 Oct, 2025
15 Oct, 2025
15 Oct, 2025
15 Oct, 2025
15 Oct, 2025
15 Oct, 2025
15 Oct, 2025
15 Oct, 2025
15 Oct, 2025
15 Oct, 2025
15 Oct, 2025
15 Oct, 2025
15 Oct, 2025
15 Oct, 2025
15 Oct, 2025
15 Oct, 2025
15 Oct, 2025
15 Oct, 2025
15 Oct, 2025
15 Oct, 2025
15 Oct, 2025
14 Oct, 2025
14 Oct, 2025
14 Oct, 2025
14 Oct, 2025
14 Oct, 2025
14 Oct, 2025
14 Oct, 2025
14 Oct, 2025
14 Oct, 2025
14 Oct, 2025
14 Oct, 2025
14 Oct, 2025
14 Oct, 2025
14 Oct, 2025
14 Oct, 2025
14 Oct, 2025
14 Oct, 2025
14 Oct, 2025
14 Oct, 2025
14 Oct, 2025
13 Oct, 2025
13 Oct, 2025
13 Oct, 2025
13 Oct, 2025
13 Oct, 2025
13 Oct, 2025
13 Oct, 2025
13 Oct, 2025
13 Oct, 2025
13 Oct, 2025
13 Oct, 2025
13 Oct, 2025
13 Oct, 2025
13 Oct, 2025
13 Oct, 2025
13 Oct, 2025
13 Oct, 2025
13 Oct, 2025
13 Oct, 2025
13 Oct, 2025
13 Oct, 2025
13 Oct, 2025
13 Oct, 2025
13 Oct, 2025
13 Oct, 2025
13 Oct, 2025
13 Oct, 2025
13 Oct, 2025
13 Oct, 2025
13 Oct, 2025
13 Oct, 2025
13 Oct, 2025
13 Oct, 2025
13 Oct, 2025
13 Oct, 2025
13 Oct, 2025
13 Oct, 2025
13 Oct, 2025
13 Oct, 2025
13 Oct, 2025
13 Oct, 2025
13 Oct, 2025
13 Oct, 2025
13 Oct, 2025
13 Oct, 2025
13 Oct, 2025
13 Oct, 2025
12 Oct, 2025
12 Oct, 2025
12 Oct, 2025
12 Oct, 2025
12 Oct, 2025
12 Oct, 2025
12 Oct, 2025
12 Oct, 2025
12 Oct, 2025
12 Oct, 2025
12 Oct, 2025
12 Oct, 2025
12 Oct, 2025
12 Oct, 2025
11 Oct, 2025
11 Oct, 2025
11 Oct, 2025
11 Oct, 2025
11 Oct, 2025
11 Oct, 2025
11 Oct, 2025
11 Oct, 2025
11 Oct, 2025
11 Oct, 2025
11 Oct, 2025
11 Oct, 2025
11 Oct, 2025
11 Oct, 2025
11 Oct, 2025
11 Oct, 2025
11 Oct, 2025
11 Oct, 2025
11 Oct, 2025
11 Oct, 2025
11 Oct, 2025
11 Oct, 2025
11 Oct, 2025
11 Oct, 2025
11 Oct, 2025
11 Oct, 2025
11 Oct, 2025
11 Oct, 2025
11 Oct, 2025
11 Oct, 2025
11 Oct, 2025
11 Oct, 2025
11 Oct, 2025
11 Oct, 2025
11 Oct, 2025
11 Oct, 2025
11 Oct, 2025
11 Oct, 2025
11 Oct, 2025
11 Oct, 2025
11 Oct, 2025
11 Oct, 2025
11 Oct, 2025
11 Oct, 2025
11 Oct, 2025
11 Oct, 2025
11 Oct, 2025
11 Oct, 2025
11 Oct, 2025
11 Oct, 2025
11 Oct, 2025
11 Oct, 2025
11 Oct, 2025
11 Oct, 2025
11 Oct, 2025
11 Oct, 2025
11 Oct, 2025
11 Oct, 2025
11 Oct, 2025
11 Oct, 2025
11 Oct, 2025
11 Oct, 2025
11 Oct, 2025
11 Oct, 2025
11 Oct, 2025
11 Oct, 2025
11 Oct, 2025
11 Oct, 2025
11 Oct, 2025
11 Oct, 2025
11 Oct, 2025
11 Oct, 2025
11 Oct, 2025
11 Oct, 2025
11 Oct, 2025
11 Oct, 2025
11 Oct, 2025
11 Oct, 2025
11 Oct, 2025
11 Oct, 2025
11 Oct, 2025
11 Oct, 2025
11 Oct, 2025
11 Oct, 2025
11 Oct, 2025
11 Oct, 2025
11 Oct, 2025
10 Oct, 2025
10 Oct, 2025
10 Oct, 2025
10 Oct, 2025
10 Oct, 2025
10 Oct, 2025
10 Oct, 2025
10 Oct, 2025
10 Oct, 2025
10 Oct, 2025
10 Oct, 2025
10 Oct, 2025
10 Oct, 2025
10 Oct, 2025
10 Oct, 2025
10 Oct, 2025
10 Oct, 2025
10 Oct, 2025
10 Oct, 2025
10 Oct, 2025
10 Oct, 2025
10 Oct, 2025
10 Oct, 2025
10 Oct, 2025
10 Oct, 2025
10 Oct, 2025
10 Oct, 2025
10 Oct, 2025
10 Oct, 2025
10 Oct, 2025
10 Oct, 2025
10 Oct, 2025
10 Oct, 2025
10 Oct, 2025
10 Oct, 2025
10 Oct, 2025
10 Oct, 2025
10 Oct, 2025
10 Oct, 2025
10 Oct, 2025
10 Oct, 2025
10 Oct, 2025
10 Oct, 2025
10 Oct, 2025
10 Oct, 2025
10 Oct, 2025
10 Oct, 2025
10 Oct, 2025
10 Oct, 2025
10 Oct, 2025
10 Oct, 2025
10 Oct, 2025
10 Oct, 2025
10 Oct, 2025
10 Oct, 2025
10 Oct, 2025
10 Oct, 2025
10 Oct, 2025
10 Oct, 2025
10 Oct, 2025
10 Oct, 2025
10 Oct, 2025
10 Oct, 2025
10 Oct, 2025
10 Oct, 2025
10 Oct, 2025
10 Oct, 2025
10 Oct, 2025
10 Oct, 2025
10 Oct, 2025
10 Oct, 2025
10 Oct, 2025
10 Oct, 2025
10 Oct, 2025
10 Oct, 2025
10 Oct, 2025
10 Oct, 2025
10 Oct, 2025
10 Oct, 2025
10 Oct, 2025
10 Oct, 2025
10 Oct, 2025
10 Oct, 2025
10 Oct, 2025
10 Oct, 2025
10 Oct, 2025
10 Oct, 2025
10 Oct, 2025
10 Oct, 2025
10 Oct, 2025
10 Oct, 2025
10 Oct, 2025
10 Oct, 2025
10 Oct, 2025
10 Oct, 2025
10 Oct, 2025
10 Oct, 2025
10 Oct, 2025
10 Oct, 2025
10 Oct, 2025
10 Oct, 2025
10 Oct, 2025
10 Oct, 2025
10 Oct, 2025
9 Oct, 2025
9 Oct, 2025
9 Oct, 2025
9 Oct, 2025
9 Oct, 2025
9 Oct, 2025
9 Oct, 2025
9 Oct, 2025
9 Oct, 2025
9 Oct, 2025
9 Oct, 2025
9 Oct, 2025
9 Oct, 2025
9 Oct, 2025
9 Oct, 2025
9 Oct, 2025
9 Oct, 2025
9 Oct, 2025
9 Oct, 2025
9 Oct, 2025
9 Oct, 2025
9 Oct, 2025
9 Oct, 2025
9 Oct, 2025
9 Oct, 2025
9 Oct, 2025
9 Oct, 2025
9 Oct, 2025
9 Oct, 2025
9 Oct, 2025
9 Oct, 2025
9 Oct, 2025
9 Oct, 2025
9 Oct, 2025
9 Oct, 2025
9 Oct, 2025
9 Oct, 2025
9 Oct, 2025
9 Oct, 2025
9 Oct, 2025
9 Oct, 2025
9 Oct, 2025
9 Oct, 2025
9 Oct, 2025
9 Oct, 2025
9 Oct, 2025
9 Oct, 2025
9 Oct, 2025
9 Oct, 2025
9 Oct, 2025
9 Oct, 2025
9 Oct, 2025
9 Oct, 2025
9 Oct, 2025
9 Oct, 2025
9 Oct, 2025
9 Oct, 2025
9 Oct, 2025
9 Oct, 2025
9 Oct, 2025
9 Oct, 2025
9 Oct, 2025
9 Oct, 2025
9 Oct, 2025
9 Oct, 2025
9 Oct, 2025
9 Oct, 2025
9 Oct, 2025
9 Oct, 2025
9 Oct, 2025
9 Oct, 2025
9 Oct, 2025
9 Oct, 2025
9 Oct, 2025
9 Oct, 2025
9 Oct, 2025
9 Oct, 2025
9 Oct, 2025
9 Oct, 2025
9 Oct, 2025
9 Oct, 2025
9 Oct, 2025
9 Oct, 2025
9 Oct, 2025
9 Oct, 2025
9 Oct, 2025
9 Oct, 2025
9 Oct, 2025
9 Oct, 2025
9 Oct, 2025
9 Oct, 2025
9 Oct, 2025
9 Oct, 2025
9 Oct, 2025
9 Oct, 2025
9 Oct, 2025
9 Oct, 2025
9 Oct, 2025
9 Oct, 2025
9 Oct, 2025
9 Oct, 2025
9 Oct, 2025
9 Oct, 2025
9 Oct, 2025
9 Oct, 2025
9 Oct, 2025
9 Oct, 2025
9 Oct, 2025
9 Oct, 2025
9 Oct, 2025
9 Oct, 2025
9 Oct, 2025
9 Oct, 2025
9 Oct, 2025
8 Oct, 2025
8 Oct, 2025
8 Oct, 2025
8 Oct, 2025
8 Oct, 2025
8 Oct, 2025
8 Oct, 2025
8 Oct, 2025
8 Oct, 2025
8 Oct, 2025
8 Oct, 2025
8 Oct, 2025
8 Oct, 2025
8 Oct, 2025
8 Oct, 2025
8 Oct, 2025
8 Oct, 2025
8 Oct, 2025
8 Oct, 2025
8 Oct, 2025
8 Oct, 2025
8 Oct, 2025
8 Oct, 2025
8 Oct, 2025
8 Oct, 2025
8 Oct, 2025
8 Oct, 2025
8 Oct, 2025
8 Oct, 2025
8 Oct, 2025
8 Oct, 2025
8 Oct, 2025
8 Oct, 2025
8 Oct, 2025
8 Oct, 2025
8 Oct, 2025
8 Oct, 2025
8 Oct, 2025
8 Oct, 2025
8 Oct, 2025
8 Oct, 2025
8 Oct, 2025
8 Oct, 2025
8 Oct, 2025
8 Oct, 2025
8 Oct, 2025
8 Oct, 2025
8 Oct, 2025
8 Oct, 2025
8 Oct, 2025
8 Oct, 2025
8 Oct, 2025
8 Oct, 2025
8 Oct, 2025
8 Oct, 2025
8 Oct, 2025
8 Oct, 2025
8 Oct, 2025
8 Oct, 2025
8 Oct, 2025
8 Oct, 2025
8 Oct, 2025
8 Oct, 2025
8 Oct, 2025
8 Oct, 2025
8 Oct, 2025
8 Oct, 2025
8 Oct, 2025
8 Oct, 2025
8 Oct, 2025
8 Oct, 2025
8 Oct, 2025
8 Oct, 2025
8 Oct, 2025
8 Oct, 2025
8 Oct, 2025
8 Oct, 2025
8 Oct, 2025
8 Oct, 2025
8 Oct, 2025
8 Oct, 2025
8 Oct, 2025
8 Oct, 2025
8 Oct, 2025
8 Oct, 2025
8 Oct, 2025
8 Oct, 2025
8 Oct, 2025
8 Oct, 2025
8 Oct, 2025
8 Oct, 2025
8 Oct, 2025
8 Oct, 2025
8 Oct, 2025
8 Oct, 2025
8 Oct, 2025
8 Oct, 2025
8 Oct, 2025
8 Oct, 2025
8 Oct, 2025
8 Oct, 2025
7 Oct, 2025
7 Oct, 2025
7 Oct, 2025
7 Oct, 2025
7 Oct, 2025
7 Oct, 2025
7 Oct, 2025
7 Oct, 2025
7 Oct, 2025
7 Oct, 2025
7 Oct, 2025
7 Oct, 2025
7 Oct, 2025
7 Oct, 2025
7 Oct, 2025
7 Oct, 2025
7 Oct, 2025
7 Oct, 2025
7 Oct, 2025
7 Oct, 2025
7 Oct, 2025
7 Oct, 2025
7 Oct, 2025
7 Oct, 2025
7 Oct, 2025
7 Oct, 2025
7 Oct, 2025
7 Oct, 2025
7 Oct, 2025
7 Oct, 2025
7 Oct, 2025
7 Oct, 2025
7 Oct, 2025
7 Oct, 2025
7 Oct, 2025
7 Oct, 2025
7 Oct, 2025
7 Oct, 2025
7 Oct, 2025
7 Oct, 2025
7 Oct, 2025
7 Oct, 2025
7 Oct, 2025
7 Oct, 2025
7 Oct, 2025
7 Oct, 2025
7 Oct, 2025
7 Oct, 2025
7 Oct, 2025
7 Oct, 2025
7 Oct, 2025
7 Oct, 2025
7 Oct, 2025
7 Oct, 2025
7 Oct, 2025
7 Oct, 2025
7 Oct, 2025
7 Oct, 2025
7 Oct, 2025
7 Oct, 2025
7 Oct, 2025
7 Oct, 2025
7 Oct, 2025
7 Oct, 2025
7 Oct, 2025
7 Oct, 2025
7 Oct, 2025
7 Oct, 2025
7 Oct, 2025
7 Oct, 2025
7 Oct, 2025
7 Oct, 2025
7 Oct, 2025
7 Oct, 2025
7 Oct, 2025
7 Oct, 2025
6 Oct, 2025
6 Oct, 2025
6 Oct, 2025
6 Oct, 2025
6 Oct, 2025
6 Oct, 2025
6 Oct, 2025
6 Oct, 2025
6 Oct, 2025
6 Oct, 2025
6 Oct, 2025
6 Oct, 2025
6 Oct, 2025
6 Oct, 2025
6 Oct, 2025
6 Oct, 2025
6 Oct, 2025
6 Oct, 2025
6 Oct, 2025
6 Oct, 2025
6 Oct, 2025
6 Oct, 2025
6 Oct, 2025
6 Oct, 2025
6 Oct, 2025
6 Oct, 2025
6 Oct, 2025
6 Oct, 2025
6 Oct, 2025
6 Oct, 2025
6 Oct, 2025
6 Oct, 2025
6 Oct, 2025
6 Oct, 2025
6 Oct, 2025
6 Oct, 2025
6 Oct, 2025
6 Oct, 2025
6 Oct, 2025
6 Oct, 2025
6 Oct, 2025
6 Oct, 2025
6 Oct, 2025
6 Oct, 2025
6 Oct, 2025
6 Oct, 2025
6 Oct, 2025
6 Oct, 2025
6 Oct, 2025
6 Oct, 2025
6 Oct, 2025
6 Oct, 2025
6 Oct, 2025
6 Oct, 2025
6 Oct, 2025
6 Oct, 2025
6 Oct, 2025
6 Oct, 2025
6 Oct, 2025
6 Oct, 2025
6 Oct, 2025
6 Oct, 2025
6 Oct, 2025
6 Oct, 2025
6 Oct, 2025
6 Oct, 2025
6 Oct, 2025
6 Oct, 2025
6 Oct, 2025
6 Oct, 2025
6 Oct, 2025
6 Oct, 2025
6 Oct, 2025
6 Oct, 2025
6 Oct, 2025
6 Oct, 2025
6 Oct, 2025
6 Oct, 2025
6 Oct, 2025
6 Oct, 2025
6 Oct, 2025
6 Oct, 2025
6 Oct, 2025
6 Oct, 2025
6 Oct, 2025
6 Oct, 2025
6 Oct, 2025
6 Oct, 2025
6 Oct, 2025
6 Oct, 2025
6 Oct, 2025
6 Oct, 2025
6 Oct, 2025
6 Oct, 2025
6 Oct, 2025
5 Oct, 2025
5 Oct, 2025
5 Oct, 2025
5 Oct, 2025
5 Oct, 2025
5 Oct, 2025
5 Oct, 2025
5 Oct, 2025
5 Oct, 2025
5 Oct, 2025
5 Oct, 2025
5 Oct, 2025
5 Oct, 2025
5 Oct, 2025
5 Oct, 2025
5 Oct, 2025
5 Oct, 2025
5 Oct, 2025
5 Oct, 2025
5 Oct, 2025
5 Oct, 2025
5 Oct, 2025
5 Oct, 2025
5 Oct, 2025
5 Oct, 2025
5 Oct, 2025
5 Oct, 2025
5 Oct, 2025
5 Oct, 2025
5 Oct, 2025
5 Oct, 2025
5 Oct, 2025
5 Oct, 2025
5 Oct, 2025
5 Oct, 2025
5 Oct, 2025
5 Oct, 2025
5 Oct, 2025
5 Oct, 2025
5 Oct, 2025
5 Oct, 2025
5 Oct, 2025
5 Oct, 2025
5 Oct, 2025
5 Oct, 2025
5 Oct, 2025
5 Oct, 2025
5 Oct, 2025
5 Oct, 2025
5 Oct, 2025
5 Oct, 2025
5 Oct, 2025
5 Oct, 2025
5 Oct, 2025
5 Oct, 2025
5 Oct, 2025
5 Oct, 2025
5 Oct, 2025
5 Oct, 2025
5 Oct, 2025
5 Oct, 2025
5 Oct, 2025
5 Oct, 2025
5 Oct, 2025
5 Oct, 2025
5 Oct, 2025
5 Oct, 2025
5 Oct, 2025
5 Oct, 2025
5 Oct, 2025
5 Oct, 2025
5 Oct, 2025
5 Oct, 2025
5 Oct, 2025
5 Oct, 2025
5 Oct, 2025
5 Oct, 2025
5 Oct, 2025
5 Oct, 2025
5 Oct, 2025
5 Oct, 2025
5 Oct, 2025
5 Oct, 2025
5 Oct, 2025
5 Oct, 2025
5 Oct, 2025
5 Oct, 2025
5 Oct, 2025
5 Oct, 2025
5 Oct, 2025
5 Oct, 2025
5 Oct, 2025
5 Oct, 2025
5 Oct, 2025
5 Oct, 2025
5 Oct, 2025
5 Oct, 2025
5 Oct, 2025
5 Oct, 2025
5 Oct, 2025
5 Oct, 2025
5 Oct, 2025
5 Oct, 2025
5 Oct, 2025
5 Oct, 2025
5 Oct, 2025
5 Oct, 2025
5 Oct, 2025
5 Oct, 2025
5 Oct, 2025
5 Oct, 2025
5 Oct, 2025
5 Oct, 2025
5 Oct, 2025
5 Oct, 2025
5 Oct, 2025
5 Oct, 2025
5 Oct, 2025
5 Oct, 2025
5 Oct, 2025
5 Oct, 2025
5 Oct, 2025
5 Oct, 2025
5 Oct, 2025
5 Oct, 2025
5 Oct, 2025
5 Oct, 2025
5 Oct, 2025
5 Oct, 2025
5 Oct, 2025
5 Oct, 2025
5 Oct, 2025
5 Oct, 2025
5 Oct, 2025
5 Oct, 2025
5 Oct, 2025
5 Oct, 2025
5 Oct, 2025
5 Oct, 2025
5 Oct, 2025
5 Oct, 2025
5 Oct, 2025
5 Oct, 2025
5 Oct, 2025
5 Oct, 2025
5 Oct, 2025
5 Oct, 2025
5 Oct, 2025
5 Oct, 2025
5 Oct, 2025
5 Oct, 2025
5 Oct, 2025
5 Oct, 2025
5 Oct, 2025
5 Oct, 2025
5 Oct, 2025
5 Oct, 2025
5 Oct, 2025
5 Oct, 2025
5 Oct, 2025
5 Oct, 2025
5 Oct, 2025
5 Oct, 2025
5 Oct, 2025
5 Oct, 2025
5 Oct, 2025
5 Oct, 2025
5 Oct, 2025
5 Oct, 2025
5 Oct, 2025
5 Oct, 2025
5 Oct, 2025
5 Oct, 2025
5 Oct, 2025
5 Oct, 2025
5 Oct, 2025
5 Oct, 2025
5 Oct, 2025
5 Oct, 2025
5 Oct, 2025
5 Oct, 2025
5 Oct, 2025
5 Oct, 2025
4 Oct, 2025
4 Oct, 2025
4 Oct, 2025
4 Oct, 2025
4 Oct, 2025
4 Oct, 2025
4 Oct, 2025
4 Oct, 2025
4 Oct, 2025
4 Oct, 2025
4 Oct, 2025
4 Oct, 2025
4 Oct, 2025
4 Oct, 2025
4 Oct, 2025
4 Oct, 2025
4 Oct, 2025
4 Oct, 2025
4 Oct, 2025
4 Oct, 2025
4 Oct, 2025
4 Oct, 2025
4 Oct, 2025
4 Oct, 2025
4 Oct, 2025
4 Oct, 2025
4 Oct, 2025
4 Oct, 2025
4 Oct, 2025
4 Oct, 2025
4 Oct, 2025
4 Oct, 2025
4 Oct, 2025
4 Oct, 2025
4 Oct, 2025
4 Oct, 2025
4 Oct, 2025
4 Oct, 2025
4 Oct, 2025
4 Oct, 2025
4 Oct, 2025
4 Oct, 2025
4 Oct, 2025
4 Oct, 2025
4 Oct, 2025
4 Oct, 2025
4 Oct, 2025
4 Oct, 2025
4 Oct, 2025
4 Oct, 2025
4 Oct, 2025
4 Oct, 2025
4 Oct, 2025
4 Oct, 2025
4 Oct, 2025
4 Oct, 2025
4 Oct, 2025
4 Oct, 2025
4 Oct, 2025
4 Oct, 2025
4 Oct, 2025
4 Oct, 2025
4 Oct, 2025
4 Oct, 2025
4 Oct, 2025
4 Oct, 2025
4 Oct, 2025
4 Oct, 2025
4 Oct, 2025
4 Oct, 2025
4 Oct, 2025
4 Oct, 2025
4 Oct, 2025
4 Oct, 2025
4 Oct, 2025
4 Oct, 2025
4 Oct, 2025
4 Oct, 2025
4 Oct, 2025
4 Oct, 2025
4 Oct, 2025
4 Oct, 2025
4 Oct, 2025
4 Oct, 2025
4 Oct, 2025
4 Oct, 2025
4 Oct, 2025
4 Oct, 2025
3 Oct, 2025
3 Oct, 2025
3 Oct, 2025
3 Oct, 2025
3 Oct, 2025
3 Oct, 2025
3 Oct, 2025
3 Oct, 2025
3 Oct, 2025
3 Oct, 2025
3 Oct, 2025
3 Oct, 2025
3 Oct, 2025
3 Oct, 2025
3 Oct, 2025
3 Oct, 2025
2 Oct, 2025
2 Oct, 2025
2 Oct, 2025
2 Oct, 2025
2 Oct, 2025
2 Oct, 2025
2 Oct, 2025
2 Oct, 2025
2 Oct, 2025
2 Oct, 2025
2 Oct, 2025
2 Oct, 2025
2 Oct, 2025
2 Oct, 2025
2 Oct, 2025
2 Oct, 2025
2 Oct, 2025
2 Oct, 2025
2 Oct, 2025
2 Oct, 2025
2 Oct, 2025
2 Oct, 2025
2 Oct, 2025
2 Oct, 2025
1 Oct, 2025
1 Oct, 2025
30 Sep, 2025
30 Sep, 2025
30 Sep, 2025
30 Sep, 2025
30 Sep, 2025
30 Sep, 2025
30 Sep, 2025
30 Sep, 2025
30 Sep, 2025
30 Sep, 2025
29 Sep, 2025
29 Sep, 2025
29 Sep, 2025
29 Sep, 2025
29 Sep, 2025
29 Sep, 2025
29 Sep, 2025
29 Sep, 2025
29 Sep, 2025
29 Sep, 2025
29 Sep, 2025
29 Sep, 2025
29 Sep, 2025
29 Sep, 2025
29 Sep, 2025
29 Sep, 2025
29 Sep, 2025
29 Sep, 2025
29 Sep, 2025
29 Sep, 2025
29 Sep, 2025
29 Sep, 2025
29 Sep, 2025
29 Sep, 2025
29 Sep, 2025
29 Sep, 2025
29 Sep, 2025
29 Sep, 2025
29 Sep, 2025
29 Sep, 2025
29 Sep, 2025
28 Sep, 2025
28 Sep, 2025
28 Sep, 2025
28 Sep, 2025
28 Sep, 2025
28 Sep, 2025
28 Sep, 2025
28 Sep, 2025
28 Sep, 2025
28 Sep, 2025
28 Sep, 2025
28 Sep, 2025
28 Sep, 2025
28 Sep, 2025
28 Sep, 2025
28 Sep, 2025
28 Sep, 2025
28 Sep, 2025
28 Sep, 2025
28 Sep, 2025
28 Sep, 2025
28 Sep, 2025
28 Sep, 2025
28 Sep, 2025
28 Sep, 2025
28 Sep, 2025
28 Sep, 2025
28 Sep, 2025
28 Sep, 2025
27 Sep, 2025
27 Sep, 2025
27 Sep, 2025
27 Sep, 2025
27 Sep, 2025
27 Sep, 2025
27 Sep, 2025
27 Sep, 2025
27 Sep, 2025
27 Sep, 2025
27 Sep, 2025
27 Sep, 2025
27 Sep, 2025
27 Sep, 2025
27 Sep, 2025
27 Sep, 2025
27 Sep, 2025
27 Sep, 2025
27 Sep, 2025
27 Sep, 2025
27 Sep, 2025
27 Sep, 2025
27 Sep, 2025
27 Sep, 2025
27 Sep, 2025
27 Sep, 2025
27 Sep, 2025
27 Sep, 2025
27 Sep, 2025
27 Sep, 2025
27 Sep, 2025
27 Sep, 2025
27 Sep, 2025
27 Sep, 2025
27 Sep, 2025
27 Sep, 2025
27 Sep, 2025
27 Sep, 2025
27 Sep, 2025
26 Sep, 2025
26 Sep, 2025
26 Sep, 2025
26 Sep, 2025
26 Sep, 2025
26 Sep, 2025
26 Sep, 2025
26 Sep, 2025
26 Sep, 2025
26 Sep, 2025
26 Sep, 2025
26 Sep, 2025
26 Sep, 2025
26 Sep, 2025
26 Sep, 2025
26 Sep, 2025
26 Sep, 2025
26 Sep, 2025
26 Sep, 2025
26 Sep, 2025
26 Sep, 2025
26 Sep, 2025
26 Sep, 2025
26 Sep, 2025
26 Sep, 2025
26 Sep, 2025
26 Sep, 2025
26 Sep, 2025
26 Sep, 2025
26 Sep, 2025
26 Sep, 2025
26 Sep, 2025
26 Sep, 2025
26 Sep, 2025
26 Sep, 2025
26 Sep, 2025
26 Sep, 2025
26 Sep, 2025
26 Sep, 2025
26 Sep, 2025
25 Sep, 2025
25 Sep, 2025
25 Sep, 2025
25 Sep, 2025
25 Sep, 2025
25 Sep, 2025
25 Sep, 2025
25 Sep, 2025
25 Sep, 2025
25 Sep, 2025
25 Sep, 2025
25 Sep, 2025
25 Sep, 2025
25 Sep, 2025
25 Sep, 2025
25 Sep, 2025
24 Sep, 2025
23 Sep, 2025
23 Sep, 2025
23 Sep, 2025
23 Sep, 2025
23 Sep, 2025
23 Sep, 2025
23 Sep, 2025
22 Sep, 2025
22 Sep, 2025
22 Sep, 2025
22 Sep, 2025
22 Sep, 2025
22 Sep, 2025
22 Sep, 2025
22 Sep, 2025
22 Sep, 2025
22 Sep, 2025
22 Sep, 2025
22 Sep, 2025
22 Sep, 2025
22 Sep, 2025
22 Sep, 2025
22 Sep, 2025
22 Sep, 2025
22 Sep, 2025
22 Sep, 2025
22 Sep, 2025
22 Sep, 2025
22 Sep, 2025
22 Sep, 2025
22 Sep, 2025
22 Sep, 2025
21 Sep, 2025
21 Sep, 2025
21 Sep, 2025
21 Sep, 2025
21 Sep, 2025
21 Sep, 2025
21 Sep, 2025
21 Sep, 2025
21 Sep, 2025
21 Sep, 2025
21 Sep, 2025
21 Sep, 2025
21 Sep, 2025
21 Sep, 2025
21 Sep, 2025
21 Sep, 2025
21 Sep, 2025
21 Sep, 2025
21 Sep, 2025
21 Sep, 2025
21 Sep, 2025
21 Sep, 2025
21 Sep, 2025
21 Sep, 2025
21 Sep, 2025
20 Sep, 2025
20 Sep, 2025
20 Sep, 2025
20 Sep, 2025
20 Sep, 2025
20 Sep, 2025
20 Sep, 2025
20 Sep, 2025
20 Sep, 2025
20 Sep, 2025
20 Sep, 2025
20 Sep, 2025
20 Sep, 2025
20 Sep, 2025
20 Sep, 2025
20 Sep, 2025
19 Sep, 2025
19 Sep, 2025
19 Sep, 2025
19 Sep, 2025
19 Sep, 2025
19 Sep, 2025
19 Sep, 2025
19 Sep, 2025
19 Sep, 2025
19 Sep, 2025
19 Sep, 2025
19 Sep, 2025
19 Sep, 2025
19 Sep, 2025
19 Sep, 2025
19 Sep, 2025
19 Sep, 2025
19 Sep, 2025
19 Sep, 2025
19 Sep, 2025
19 Sep, 2025
19 Sep, 2025
19 Sep, 2025
19 Sep, 2025
19 Sep, 2025
19 Sep, 2025
19 Sep, 2025
19 Sep, 2025
19 Sep, 2025
19 Sep, 2025
19 Sep, 2025
19 Sep, 2025
19 Sep, 2025
19 Sep, 2025
19 Sep, 2025
19 Sep, 2025
19 Sep, 2025
19 Sep, 2025
19 Sep, 2025
19 Sep, 2025
19 Sep, 2025
19 Sep, 2025
19 Sep, 2025
19 Sep, 2025
19 Sep, 2025
19 Sep, 2025
19 Sep, 2025
19 Sep, 2025
19 Sep, 2025
19 Sep, 2025
18 Sep, 2025
18 Sep, 2025
18 Sep, 2025
18 Sep, 2025
18 Sep, 2025
18 Sep, 2025
18 Sep, 2025
18 Sep, 2025
18 Sep, 2025
18 Sep, 2025
18 Sep, 2025
18 Sep, 2025
18 Sep, 2025
18 Sep, 2025
18 Sep, 2025
18 Sep, 2025
18 Sep, 2025
18 Sep, 2025
18 Sep, 2025
18 Sep, 2025
18 Sep, 2025
18 Sep, 2025
18 Sep, 2025
18 Sep, 2025
17 Sep, 2025
17 Sep, 2025
17 Sep, 2025
17 Sep, 2025
17 Sep, 2025
17 Sep, 2025
17 Sep, 2025
17 Sep, 2025
16 Sep, 2025
16 Sep, 2025
16 Sep, 2025
16 Sep, 2025
16 Sep, 2025
16 Sep, 2025
16 Sep, 2025
16 Sep, 2025
16 Sep, 2025
16 Sep, 2025
16 Sep, 2025
16 Sep, 2025
16 Sep, 2025
16 Sep, 2025
16 Sep, 2025
16 Sep, 2025
16 Sep, 2025
16 Sep, 2025
16 Sep, 2025
16 Sep, 2025
16 Sep, 2025
16 Sep, 2025
16 Sep, 2025
16 Sep, 2025
16 Sep, 2025
16 Sep, 2025
16 Sep, 2025
16 Sep, 2025
15 Sep, 2025
15 Sep, 2025
15 Sep, 2025
15 Sep, 2025
15 Sep, 2025
15 Sep, 2025
15 Sep, 2025
15 Sep, 2025
15 Sep, 2025
15 Sep, 2025
15 Sep, 2025
15 Sep, 2025
15 Sep, 2025
15 Sep, 2025
15 Sep, 2025
14 Sep, 2025
14 Sep, 2025
14 Sep, 2025
14 Sep, 2025
14 Sep, 2025
14 Sep, 2025
14 Sep, 2025
14 Sep, 2025
14 Sep, 2025
14 Sep, 2025
14 Sep, 2025
14 Sep, 2025
14 Sep, 2025
14 Sep, 2025
14 Sep, 2025
14 Sep, 2025
14 Sep, 2025
14 Sep, 2025
13 Sep, 2025
12 Sep, 2025
12 Sep, 2025
12 Sep, 2025
12 Sep, 2025
12 Sep, 2025
12 Sep, 2025
12 Sep, 2025
12 Sep, 2025
11 Sep, 2025
11 Sep, 2025
11 Sep, 2025
11 Sep, 2025
11 Sep, 2025
11 Sep, 2025
11 Sep, 2025
11 Sep, 2025
11 Sep, 2025
11 Sep, 2025
11 Sep, 2025
11 Sep, 2025
11 Sep, 2025
11 Sep, 2025
11 Sep, 2025
11 Sep, 2025
11 Sep, 2025
11 Sep, 2025
11 Sep, 2025
11 Sep, 2025
11 Sep, 2025
11 Sep, 2025
10 Sep, 2025
10 Sep, 2025
10 Sep, 2025
10 Sep, 2025
10 Sep, 2025
9 Sep, 2025
9 Sep, 2025
9 Sep, 2025
9 Sep, 2025
9 Sep, 2025
9 Sep, 2025
9 Sep, 2025
9 Sep, 2025
9 Sep, 2025
9 Sep, 2025
9 Sep, 2025
9 Sep, 2025
9 Sep, 2025
8 Sep, 2025
8 Sep, 2025
8 Sep, 2025
8 Sep, 2025
8 Sep, 2025
8 Sep, 2025
8 Sep, 2025
8 Sep, 2025
8 Sep, 2025
8 Sep, 2025
8 Sep, 2025
8 Sep, 2025
8 Sep, 2025
8 Sep, 2025
8 Sep, 2025
8 Sep, 2025
8 Sep, 2025
8 Sep, 2025
8 Sep, 2025
7 Sep, 2025
6 Sep, 2025
6 Sep, 2025
6 Sep, 2025
6 Sep, 2025
6 Sep, 2025
5 Sep, 2025
5 Sep, 2025
5 Sep, 2025
5 Sep, 2025
5 Sep, 2025
5 Sep, 2025
5 Sep, 2025
5 Sep, 2025
5 Sep, 2025
5 Sep, 2025
4 Sep, 2025
4 Sep, 2025
4 Sep, 2025
4 Sep, 2025
3 Sep, 2025
3 Sep, 2025
2 Sep, 2025
2 Sep, 2025
2 Sep, 2025
2 Sep, 2025
2 Sep, 2025
2 Sep, 2025
2 Sep, 2025
2 Sep, 2025
2 Sep, 2025
2 Sep, 2025
2 Sep, 2025
2 Sep, 2025
2 Sep, 2025
2 Sep, 2025
2 Sep, 2025
2 Sep, 2025
2 Sep, 2025
1 Sep, 2025
1 Sep, 2025
1 Sep, 2025
1 Sep, 2025
1 Sep, 2025
1 Sep, 2025
1 Sep, 2025
1 Sep, 2025
1 Sep, 2025
1 Sep, 2025
1 Sep, 2025
1 Sep, 2025
1 Sep, 2025
1 Sep, 2025
1 Sep, 2025
1 Sep, 2025
1 Sep, 2025
1 Sep, 2025
1 Sep, 2025
1 Sep, 2025
1 Sep, 2025
1 Sep, 2025
1 Sep, 2025
1 Sep, 2025
1 Sep, 2025
31 Aug, 2025
31 Aug, 2025
31 Aug, 2025
31 Aug, 2025
31 Aug, 2025
31 Aug, 2025
31 Aug, 2025
31 Aug, 2025
31 Aug, 2025
31 Aug, 2025
31 Aug, 2025
31 Aug, 2025
31 Aug, 2025
31 Aug, 2025
31 Aug, 2025
31 Aug, 2025
31 Aug, 2025
30 Aug, 2025
30 Aug, 2025
30 Aug, 2025
30 Aug, 2025
30 Aug, 2025
30 Aug, 2025
30 Aug, 2025
30 Aug, 2025
30 Aug, 2025
29 Aug, 2025
29 Aug, 2025
29 Aug, 2025
29 Aug, 2025
29 Aug, 2025
29 Aug, 2025
29 Aug, 2025
29 Aug, 2025
29 Aug, 2025
29 Aug, 2025
29 Aug, 2025
29 Aug, 2025
29 Aug, 2025
29 Aug, 2025
29 Aug, 2025
29 Aug, 2025
29 Aug, 2025
29 Aug, 2025
29 Aug, 2025
29 Aug, 2025
29 Aug, 2025
29 Aug, 2025
28 Aug, 2025
28 Aug, 2025
28 Aug, 2025
28 Aug, 2025
28 Aug, 2025
28 Aug, 2025
28 Aug, 2025
28 Aug, 2025
28 Aug, 2025
28 Aug, 2025
28 Aug, 2025
28 Aug, 2025
28 Aug, 2025
28 Aug, 2025
28 Aug, 2025
28 Aug, 2025
28 Aug, 2025
28 Aug, 2025
28 Aug, 2025
28 Aug, 2025
28 Aug, 2025
28 Aug, 2025
28 Aug, 2025
28 Aug, 2025
28 Aug, 2025
28 Aug, 2025
27 Aug, 2025
27 Aug, 2025
27 Aug, 2025
27 Aug, 2025
27 Aug, 2025
27 Aug, 2025
27 Aug, 2025
27 Aug, 2025
27 Aug, 2025
27 Aug, 2025
27 Aug, 2025
27 Aug, 2025
27 Aug, 2025
27 Aug, 2025
27 Aug, 2025
27 Aug, 2025
27 Aug, 2025
27 Aug, 2025
26 Aug, 2025
26 Aug, 2025
26 Aug, 2025
26 Aug, 2025
26 Aug, 2025
26 Aug, 2025
26 Aug, 2025
26 Aug, 2025
26 Aug, 2025
26 Aug, 2025
26 Aug, 2025
26 Aug, 2025
26 Aug, 2025
26 Aug, 2025
26 Aug, 2025
26 Aug, 2025
26 Aug, 2025
25 Aug, 2025
25 Aug, 2025
24 Aug, 2025
24 Aug, 2025
23 Aug, 2025
23 Aug, 2025
23 Aug, 2025
23 Aug, 2025
23 Aug, 2025
23 Aug, 2025
23 Aug, 2025
23 Aug, 2025
23 Aug, 2025
23 Aug, 2025
23 Aug, 2025
23 Aug, 2025
23 Aug, 2025
23 Aug, 2025
23 Aug, 2025
23 Aug, 2025
23 Aug, 2025
22 Aug, 2025
22 Aug, 2025
22 Aug, 2025
22 Aug, 2025
22 Aug, 2025
22 Aug, 2025
22 Aug, 2025
21 Aug, 2025
21 Aug, 2025
20 Aug, 2025
20 Aug, 2025
20 Aug, 2025
20 Aug, 2025
20 Aug, 2025
19 Aug, 2025
19 Aug, 2025
19 Aug, 2025
19 Aug, 2025
19 Aug, 2025
19 Aug, 2025
18 Aug, 2025
18 Aug, 2025
18 Aug, 2025
18 Aug, 2025
18 Aug, 2025
17 Aug, 2025
17 Aug, 2025
17 Aug, 2025
17 Aug, 2025
17 Aug, 2025
17 Aug, 2025
17 Aug, 2025
17 Aug, 2025
17 Aug, 2025
17 Aug, 2025
17 Aug, 2025
16 Aug, 2025
16 Aug, 2025
16 Aug, 2025
16 Aug, 2025
16 Aug, 2025
16 Aug, 2025
16 Aug, 2025
16 Aug, 2025
16 Aug, 2025
16 Aug, 2025
16 Aug, 2025
16 Aug, 2025
16 Aug, 2025
16 Aug, 2025
16 Aug, 2025
16 Aug, 2025
16 Aug, 2025
16 Aug, 2025
16 Aug, 2025
16 Aug, 2025
15 Aug, 2025
15 Aug, 2025
14 Aug, 2025
14 Aug, 2025
14 Aug, 2025
14 Aug, 2025
14 Aug, 2025
14 Aug, 2025
14 Aug, 2025
14 Aug, 2025
14 Aug, 2025
14 Aug, 2025
14 Aug, 2025
13 Aug, 2025
13 Aug, 2025
13 Aug, 2025
13 Aug, 2025
12 Aug, 2025
12 Aug, 2025
12 Aug, 2025
12 Aug, 2025
12 Aug, 2025
12 Aug, 2025
12 Aug, 2025
12 Aug, 2025
12 Aug, 2025
12 Aug, 2025
12 Aug, 2025
12 Aug, 2025
12 Aug, 2025
11 Aug, 2025
11 Aug, 2025
11 Aug, 2025
11 Aug, 2025
11 Aug, 2025
11 Aug, 2025
11 Aug, 2025
11 Aug, 2025
11 Aug, 2025
10 Aug, 2025
9 Aug, 2025
9 Aug, 2025
9 Aug, 2025
9 Aug, 2025
8 Aug, 2025
8 Aug, 2025
7 Aug, 2025
7 Aug, 2025
7 Aug, 2025
7 Aug, 2025
7 Aug, 2025
7 Aug, 2025
7 Aug, 2025
6 Aug, 2025
6 Aug, 2025
6 Aug, 2025
6 Aug, 2025
6 Aug, 2025
6 Aug, 2025
6 Aug, 2025
6 Aug, 2025
6 Aug, 2025
5 Aug, 2025
5 Aug, 2025
5 Aug, 2025
5 Aug, 2025
5 Aug, 2025
5 Aug, 2025
5 Aug, 2025
5 Aug, 2025
2 Aug, 2025
28 Jul, 2025
28 Jul, 2025
28 Jul, 2025
28 Jul, 2025
28 Jul, 2025
28 Jul, 2025
28 Jul, 2025
28 Jul, 2025
28 Jul, 2025
28 Jul, 2025
28 Jul, 2025
28 Jul, 2025
28 Jul, 2025
27 Jul, 2025
27 Jul, 2025
27 Jul, 2025
25 Jul, 2025
24 Jul, 2025
24 Jul, 2025
24 Jul, 2025
24 Jul, 2025
23 Jul, 2025
23 Jul, 2025
23 Jul, 2025
23 Jul, 2025
23 Jul, 2025
23 Jul, 2025
23 Jul, 2025
23 Jul, 2025
23 Jul, 2025
23 Jul, 2025
23 Jul, 2025
23 Jul, 2025
23 Jul, 2025
23 Jul, 2025
22 Jul, 2025
22 Jul, 2025
22 Jul, 2025
22 Jul, 2025
22 Jul, 2025
22 Jul, 2025
22 Jul, 2025
22 Jul, 2025
22 Jul, 2025
22 Jul, 2025
22 Jul, 2025
22 Jul, 2025
22 Jul, 2025
22 Jul, 2025
22 Jul, 2025
21 Jul, 2025
21 Jul, 2025
20 Jul, 2025
19 Jul, 2025
19 Jul, 2025
18 Jul, 2025
18 Jul, 2025
18 Jul, 2025
18 Jul, 2025
18 Jul, 2025
18 Jul, 2025
18 Jul, 2025
17 Jul, 2025
16 Jul, 2025
16 Jul, 2025
15 Jul, 2025
15 Jul, 2025
15 Jul, 2025
15 Jul, 2025
14 Jul, 2025
14 Jul, 2025
14 Jul, 2025
14 Jul, 2025
14 Jul, 2025
14 Jul, 2025
13 Jul, 2025
13 Jul, 2025
13 Jul, 2025
13 Jul, 2025
13 Jul, 2025
13 Jul, 2025
12 Jul, 2025
12 Jul, 2025
11 Jul, 2025
11 Jul, 2025
11 Jul, 2025
11 Jul, 2025
11 Jul, 2025
3 Jul, 2025
3 Jul, 2025
3 Jul, 2025
3 Jul, 2025
3 Jul, 2025
1 Jul, 2025
30 Jun, 2025
29 Jun, 2025
25 Jun, 2025
24 Jun, 2025
24 Jun, 2025
24 Jun, 2025
24 Jun, 2025
24 Jun, 2025
24 Jun, 2025
24 Jun, 2025
24 Jun, 2025
23 Jun, 2025
23 Jun, 2025
23 Jun, 2025
22 Jun, 2025
22 Jun, 2025
22 Jun, 2025
22 Jun, 2025
22 Jun, 2025
22 Jun, 2025
22 Jun, 2025
22 Jun, 2025
22 Jun, 2025
22 Jun, 2025
22 Jun, 2025
22 Jun, 2025
22 Jun, 2025
22 Jun, 2025
21 Jun, 2025
21 Jun, 2025
21 Jun, 2025
21 Jun, 2025
20 Jun, 2025
18 Jun, 2025
17 Jun, 2025
15 Jun, 2025
15 Jun, 2025
15 Jun, 2025
15 Jun, 2025
14 Jun, 2025
14 Jun, 2025
14 Jun, 2025
14 Jun, 2025
13 Jun, 2025
13 Jun, 2025
13 Jun, 2025
13 Jun, 2025
13 Jun, 2025
12 Jun, 2025
12 Jun, 2025
12 Jun, 2025
12 Jun, 2025
12 Jun, 2025
12 Jun, 2025
12 Jun, 2025
11 Jun, 2025
11 Jun, 2025
11 Jun, 2025
11 Jun, 2025
11 Jun, 2025
11 Jun, 2025
11 Jun, 2025
11 Jun, 2025
10 Jun, 2025
10 Jun, 2025
10 Jun, 2025
10 Jun, 2025
10 Jun, 2025
10 Jun, 2025
9 Jun, 2025
9 Jun, 2025
9 Jun, 2025
9 Jun, 2025
9 Jun, 2025
9 Jun, 2025
9 Jun, 2025
9 Jun, 2025
9 Jun, 2025
8 Jun, 2025
8 Jun, 2025
8 Jun, 2025
8 Jun, 2025
7 Jun, 2025
7 Jun, 2025
6 Jun, 2025
5 Jun, 2025
5 Jun, 2025
5 Jun, 2025
4 Jun, 2025
4 Jun, 2025
4 Jun, 2025
4 Jun, 2025
3 Jun, 2025
3 Jun, 2025
3 Jun, 2025
3 Jun, 2025
2 Jun, 2025
1 Jun, 2025
1 Jun, 2025
29 May, 2025
29 May, 2025
29 May, 2025
29 May, 2025
29 May, 2025
29 May, 2025
29 May, 2025
1 Mar, 2016