My first PC Building Experience
Somewhere in 2020 I decided to start saving up for a new PC. At the same time I was doing loads of research and gradually warmed up to the idea of building it myself instead of having an “expert” do it for me. Loads of YouTube videos and other research prepared me and made me confident enough to where I bit the bullet and started ordering the parts in January of 2021. Spoiler alert: everything turned out great, but let’s elaborate on the journey of my first PC building experience.
A Note on Pricing and Availability
I’m not going to specifically list any prices as they are mostly irrelevant to anyone that is not me. Prices change over time and they aren’t the same in every country. Your budget for a PC is personal to yourself. I do want to note that even during the great hardware shortage of late 2020 and into 2021 I was able to obtain everything at normal prices. Sometimes that did mean looking a little harder and occasionally getting lucky.
Part picking
This was a fun part of the process. I had spread sheets with different configurations and budgets going. Other sheets had alternative parts and each component had it’s own “pros and cons” section. From those sheets I linked to official manufacturer websites and also the best deals I could find for them online. This meant that by the time it came to ordering the components, it was incredibly simple and efficient. Let’s take a look at the parts I ended up with.

CPU: AMD Ryzen 7 5800X
Going Intel or AMD was a tougher question before the 5000 series came out, but I made the decision for either the 5600x or 5800x. The final choice did get influenced by the popularity and following price increase of the 5600x landing it way to close to the 5800x to ignore. The 5800x with it’s 2 extra cores would be just that extra oomph for my occasional video editing and possibly future proof it a bit more when future games start utilizing more cores.
Thoughts after the matter? Completely happy with it.
Motherboard: Gigabyte B550 Aorus Pro AC
Naturally, my choice of CPU points me into a very specific direction for motherboards. X570 or B550? The extra features on X570 didn’t matter enough to justify the extra cost, so I went for B550. Now came the difficult choice of picking a motherboard from so many seemingly identical offerings. Here are some things I looked for.
I didn’t want an ugly board. Nice solid covers over the back panel ports and integrated back-IO shield would be a plus. A did opt for a bit of customizable RGB lighting, and of course, plenty of RGB and aRGB ports.
But more importantly, I made specific note of the number of USB ports on the back, because many boards seem to be quite lacking in that department. And crucially, I needed a board with a BIOS flash button that would allow me to update the BIOS to support Zen 3 CPUs without having a compatible CPU installed.
Thoughts after the matter? Updating the BIOS with only the power supply connected worked wonderfully and having 2 m.2 slots proved to be a great feature, too! I’m very happy with my decision.
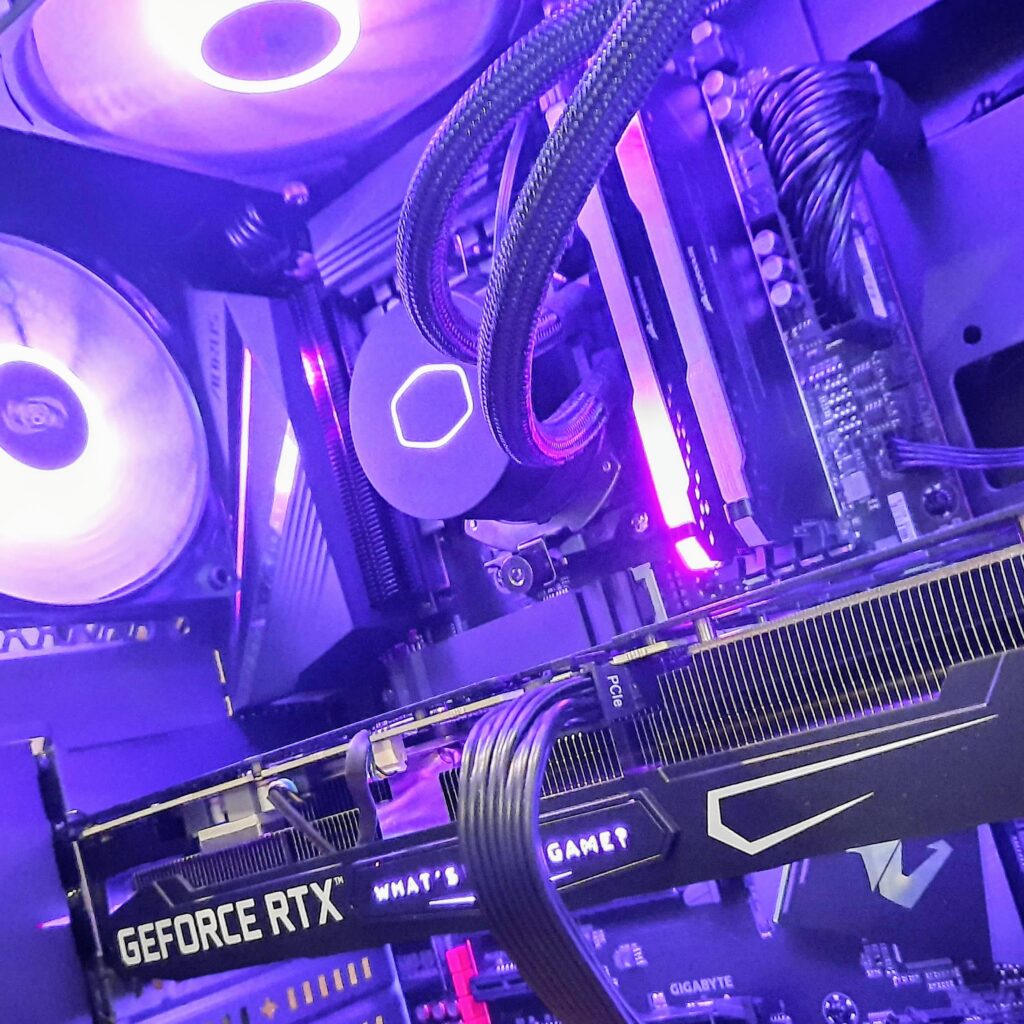
GPU: Galax GeForce RTX 3070 SG
This is the exciting part! The graphics card really plays an important role in gaming performance, so when RTX 30 series came out I knew it would be a great upgrade. The 3070 is in a real sweet spot for 1440p gaming and since my 1440p monitor could only do 60Hz I didn’t need to go overboard. Why the Galax model specifically? Well, that was due to availability. I did look at some other models, all with a 3 fan configuration, but when the time came to order, this was the only good deal I could take.
The AMD RDNA2 cards were also released but NVidia’s extra features, such as DLSS, RTX voice (NVidia Broadcast) and Shadowplay, kept me going team green.
Thoughts after the matter? I kinda wish I’d have gone for the 3080 instead. That thing I said earlier about my 1440p monitor being limited to 60Hz… I have since upgraded to a 165Hz GSync monitor, so now there’s that. I’m not going to suffer from it, but one of the reasons, aside from price, that made me pick a 3070 was the monitor, and that’s now nullified. Still, I’m absolutely stoked that I still have a 30 series GPU that’s performing amazingly and in a year or two we’ll see what’s up with new GPUs.
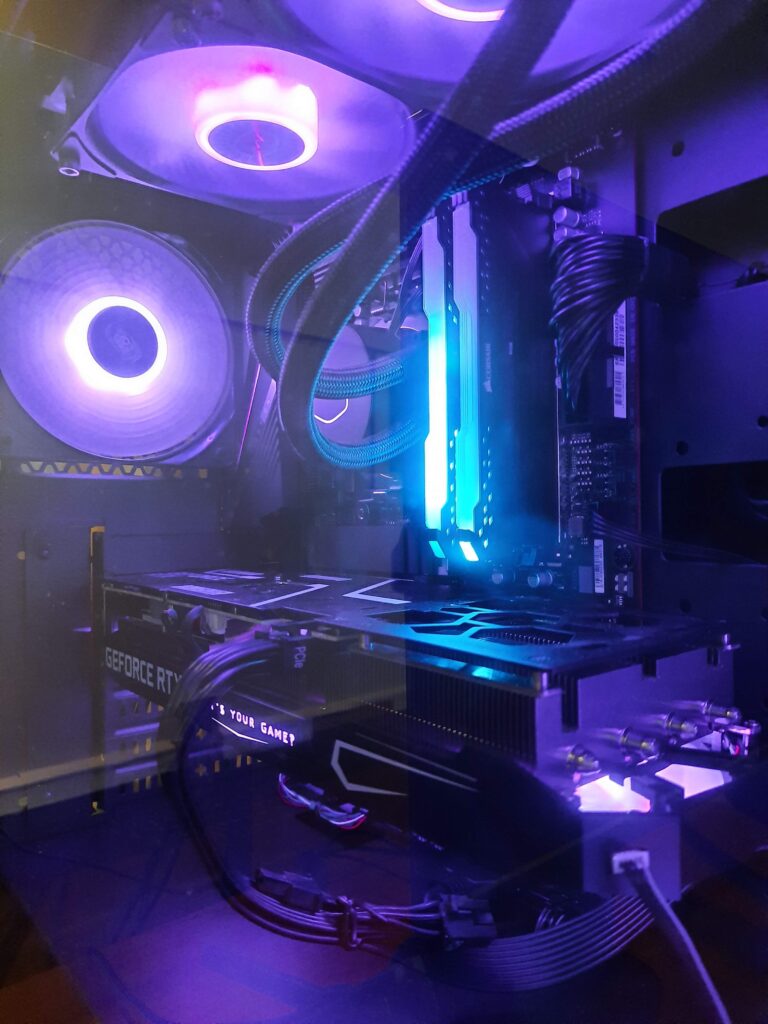
RAM: 32GB (2x16GB) 3600 Corsair Vengeance RGB PRO
It’s RAM. I was aiming for 32GB 3600MHz and that’s what I got. It also has RGB lighting, yay (with sarcasm). 16GB wouldn’t cut it as I like to play a bit of Star Citizen now and again and that game is a memory hog. Plus that extra memory comes in handy with video editing and such. 3600MHz because that’s supposedly well suited to the Zen 3’s Infinity Fabric timing.
Thoughts after the matter? It’s good. It’s cool that it lights up. Can’t complain here.
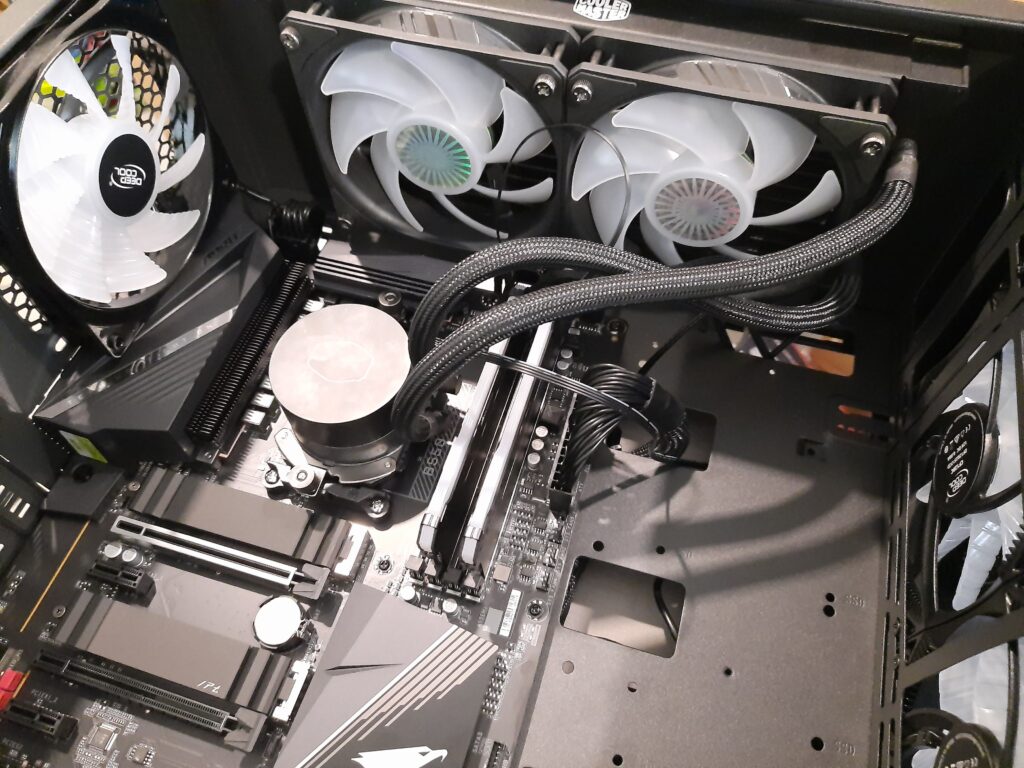
CPU Cooler: Cooler Master Masterliquid ML240L V2 RGB
I had planned to get a 240mm liquid cooler, so in this case, within bounds of decently reviewed products, it came down to pricing and a bit of the old RGB lighting for extra flare.
Thoughts after the matter? It’s a fine product and it’s keeping my CPU cool. Lights look cool, too. No complaints.
Power Supply: Corsair RM750 80+ Gold
I needed a decent power supply, preferably modular, and black cables (no ketchup and mustard for me). That’s what this power supply is.
Thoughts after the matter? Everything works great, but in hindsight I maybe should have gone for an 850w unit which would give me more headroom in case I wanted to upgrade to a beefier GPU in the future. Just a bit of future-proofing I might have missed out on.
Case: DeepCool Matrexx 55 Mesh ADD-RGB 4F
There were several factors I looked at when hunting down a case for my computer. Ventilation had to be good, so a mesh front panel was a must. Although, I did not want anything ugly sitting on my desk constantly in view. Another decision I made early on is that I wanted a tempered glass side panel so I could show off some of that bling bling RGB and just gawk at my own pride and joy. USB ports on the front of the case were a consideration, and the number of pre-installed fans was factored in. This case looked sleek and came with 4 addressable RGB fans. Done deal.
Thoughts after the matter? It became evident where costs were saved on this case. There are some little things that more premium cases don’t suffer from. For instance, the PCIe slot covers had to be broken off instead of screwed off, and there is no customization for the hard drive bays. The case looks great on my desk, but it just lacks that extra feeling of quality that I was hoping for.
Storage: 500GB m.2 nvme + 2 x 1TB HDD
I moved this from my old PC into my new PC. I use the m.2 drive for the operating system and games, and the other spinning disks for all my other files.
Thoughts after the matter? I added a second m.2 drive with 1TB of space which I now use for games, freeing up some much needed space on my 500GB m.2 drive for the operating system and other software. I hope to also replace the 2 spinning drives with a single 2TB SSD one day. We’ll see when the time comes.

How did building go?
It turned out much easier than I thought it would be, and I didn’t think it would be very difficult to begin with. I was very well prepared and did tons of research so I was feeling quite confident. It was a great adventure as all the packages came in with the components. My wife helped me set up an a spare table to use as my workspace and I tried to get my 5 year old daughter involved to help me a little here and there.
The part I found the most difficult was the wiring up of the RGB fans, but even that was pretty easy after I figured out how the daisy-chaining system worked. When I booted up the system, there was one fan that didn’t turn, but it was easily fixed as it was the front panel dust filter that was slightly out of place pushing against it.
All in all it was a great feeling to have all my prep work pay off and have the entire build complete without any major problems. I did have to reinstall Windows because it wasn’t super happy coming from an Intel based system before, but that was the only hitch. It worked, but it didn’t perform 100% until after the clean install.
All that RGB? That was another little concern- I did not want to end up having 5 different applications running in the background to control the various RGB lighting on all those components. Luckily, once picking the colors, I don’t have to leave the applications open or have them run at start-up. The motherboard controls all the lighting except for the RAM sticks which have to be set up in their own application. But, once again, I only have to run the app once to pick the colors and then I’m done (until I want different colors).
Final Word
If you are considering an upgrade to your PC, but you’re on the fence about building it yourself, hop off that fence right now! Building your own PC is not very difficult if you do your research, and it leaves you with a beautiful machine that you can take tons of pride in. I highly recommend it.
I know that if you are reading this early 2021 we might still be in the GPU drought, but that just means you can start your research and be ready when stock is available at normal prices again.
Special thanks to Steve from GamersNexus, Jay from JayzTwoCents, BitWit, Linus, Paul’s Hardware, Greg Salazar and other awesome YouTubers for the resources and tutorials.
2 Jul, 2026
7 May, 2026
30 Apr, 2026
10 Apr, 2026
4 Apr, 2026
15 Mar, 2026
13 Mar, 2026
11 Jan, 2026
23 Dec, 2025
22 Dec, 2025
22 Dec, 2025
22 Dec, 2025
21 Dec, 2025
21 Dec, 2025
21 Dec, 2025
21 Dec, 2025
21 Dec, 2025
21 Dec, 2025
20 Dec, 2025
20 Dec, 2025
20 Dec, 2025
17 Dec, 2025
7 Dec, 2025
24 Nov, 2025
23 Nov, 2025
21 Nov, 2025
20 Nov, 2025
20 Nov, 2025
20 Nov, 2025
4 Nov, 2025
2 Nov, 2025
31 Oct, 2025
16 Oct, 2025
15 Oct, 2025
14 Oct, 2025
6 Oct, 2025
4 Oct, 2025
30 Sep, 2025
21 Sep, 2025
14 Sep, 2025
6 Jul, 2025
22 Jun, 2025
22 Jun, 2025
21 Jun, 2025
18 Jun, 2025
7 Jun, 2025
7 Jun, 2025
5 Jun, 2025
4 Jun, 2025
3 Jun, 2025
2 Jun, 2025
19 May, 2025
4 May, 2025
1 May, 2025
30 Apr, 2025
29 Apr, 2025
17 Apr, 2025
15 Apr, 2025
14 Apr, 2025
13 Apr, 2025
10 Mar, 2025
20 Feb, 2025
9 Feb, 2025
23 Dec, 2024